Sponsors


Routing in Angular 2
Learning the process of routing to create several paths in AngularJS 2 websites.
If you have read my previous articles, then you know that I have built a home page using AngularJS 2. If you visit the home page, you will realize that it's a single-page website and its navigation menu (i.e., home, about, contact, etc.) doesn't point to another link or the path in a website (but simply leads you to the elements in the same page!). In most websites, navigation links are supposed to let users visit the other parts of the website and not some section within a single page!
Routing has been the part of several JavaScript Frameworks, because it allows you to separate the different parts of the application using the URLs to denote the locations, so it is considered a standard in professional web development framework. For example, considering our previous home page template, with routing the "home", "about" and "contact" will lead you to "/home" (or simply the main/root site), "/about" and "/contact" of the website, i.e., www.examplesite.com/about.
This enables you to separate the views of your models into different components/modules that render in different routes, allowing you to define different logic for different stuff, such as, provide a login form in the /login page, contact form in /contact page, etc.
In this article, I am going to show you how to use the powerful routing in AngularJS 2. Let's get started!
Routing in AngularJS 2
We will be using AngularJS 2 CLI for creating the project, but first let's understand what routing really is.
As I said earlier, Routing provides a way to separate the components on your website into different URLs. In AngularJS 2, we use the following three components:
- RouterModule- It describes the routes that we are going to use in our application through forRoot().
- RouterOutlet - It is used to render the content of each routes, kind of a placeholder.
- RouterLink - It is used to link to different routes.
Let's say we are going to use four components that we want to use as routes, we will import "RouterModule" from "@angular/router" and then we will use its 'forRoot' method:
RouterModule.forRoot([

{ path: '', component: HomeComponent },

{ path: 'about', component: AboutComponent },

{ path: 'contact', component: ContactComponent },

{ path: 'login', component: LoginComponent }

])
You can see that I have added paths to all the components I am going to use. forRoot is a method to describe which routes are needed in the application. 'path' is used to specify the URL, 'component' is used to specify the component we want to route to. In this way you can add as many routes as you want. Note that this follows the new routing syntax, so you don't need to add "/" in the path as you had to do in previous AngularJS 2 versions.
RouterOutlet describes where to render the content in the view or in other words it acts as a "placeholder" for our components that are acting as routes. We usually add it in the end of our template HTML files of the components.
<div>

    ....

    ....

    <router-outlet></router-outlet>

</div>
So, here, wherever the browser sees <router-outlet> tag, it will render the content of the routes.
Now, the RouterLink directive is used to navigate the routes.
<a [routerLink]="['/']">Home</a>

<a [routerLink]="['/about']">About</a>

<a [routerLink]="['/contact']">Contact</a>

<a [routerLink]="['/login']">Login</a>
Without RouterLink, we had to reload the page when the user clicks a navigation menu, but this is not what is desired in single-page applications. Notice we are using the new routing method in recent versions of AngularJS 2 and not the deprecated version. So, now let's see how we can apply the routing in the project.
Creating the homepage
Let's create a new project called "AngularJS2-RoutingPractice":
$ng new AngularJS2-RoutingPracticeNow, create some components that we will use as routes:
$ng g component home

$ng g component about

$ng g component contact

$ng g component login
If you do "ng serve" at this moment, you will see nothing but "app works!" on http://localhost:4200/. So, let's copy some code into the components files.
Following is the content of the files:
about.component.ts
import { Component, OnInit } from '@angular/core';

@Component({

  selector: 'app-about',
  templateUrl: './about.component.html',
  styleUrls: ['./about.component.css']

})

export class AboutComponent implements OnInit {

  title: string = 'About Page';
  body:  string = 'This is the about page!';
  message: string;
  constructor() { }
  ngOnInit() {

  }

}
about.component.html
<h1>{{ title }}</h1>

<p>{{ body }}</p>
And the same for other components:
contact.component.ts
import { Component, OnInit } from '@angular/core';

@Component({
  selector: 'app-contact',
  templateUrl: './contact.component.html',
  styleUrls: ['./contact.component.css']

})

export class ContactComponent implements OnInit {

  title: string = 'Contact Page';
  body:  string = 'This is the contact page!';
  message: string;

  constructor() { }
  ngOnInit() {

  }

}
contact.component.html
<h1>{{ title }}</h1>

<p>{{ body }}</p>
You can do the similar for other components, all you need to do is copy the previous component code and change the "title" and "body" properties. I won't write login-component and home-component code here.
Now, create a new file "app-routing.module.ts" in the "app/" folder.
app-routing.module.ts
import { NgModule }     from '@angular/core';
import { RouterModule } from '@angular/router';
import {Component} from '@angular/core';
import {AboutComponent} from './about/about.component';
import {LoginComponent} from './login/login.component';
import {HomeComponent} from './home/home.component';
import {ContactComponent} from './contact/contact.component';

@NgModule({
  imports: [
    RouterModule.forRoot([
      { path: '', component: HomeComponent },
      { path: 'about', component: AboutComponent },
      { path: 'contact', component: ContactComponent },
      { path: 'login', component: LoginComponent }
    ])
  ],

  exports: [
    RouterModule
  ]

})

export class AppRoutingModule {}
Here, you can see that I have defined the forRoot() method. This is where we tell the AngularJS what routes the application have. Copy the following code in "app.module.ts":
app.module.ts
import { BrowserModule } from '@angular/platform-browser';
import { NgModule } from '@angular/core';
import { FormsModule } from '@angular/forms';
import { HttpModule } from '@angular/http';
import { AppComponent } from './app.component';
import { HomeComponent } from './home/home.component';
import { AboutComponent } from './about/about.component';
import { ContactComponent } from './contact/contact.component';
import { LoginComponent } from './login/login.component';
import { AppRoutingModule }     from './app-routing.module';

@NgModule({
  declarations: [
    AppComponent,
    HomeComponent,
    AboutComponent,
    ContactComponent,
    LoginComponent

  ],

  imports: [
    BrowserModule,
    FormsModule,
    HttpModule,
    AppRoutingModule
  ],

  providers: [],
  bootstrap: [AppComponent]
})

export class AppModule { }
Here, I did nothing but added the required modules that we have created earlier. Now copy the following code in "app.component.html":
app.component.html
<h1>Angular Router Example</h1>
<nav>
<a [routerLink]="['/']">Home</a>
<a [routerLink]="['/about']">About</a>
<a [routerLink]="['/contact']">Contact</a>
<a [routerLink]="['/login']">Login</a>
</nav>
<router-outlet></router-outlet>
This is the important code. Here, I have added the routerLink that highlights the URLs of the routes. This is what your "app" directory should look like.
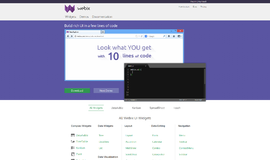
If you do "ng serve" now in the root directory, then you will see the following:
If you click the different links (i.e., About, Contact and Login) then it will lead you to the respective pages (you can see the change in the URL in your browser!).
You can add the code from the previous login-form tutorial and home-page tutorial in this project to create your desired application.
For more information, see here (https://angular.io/docs/ts/latest/guide/router.html).
See the repository on the Github (https://github.com/danyalzia/AngularJS2-RoutingPractice).
Conclusion
Thus so far you are able to read what I have written about routing in AngularJS 2. It takes you to the next step in your pursuit to writing powerful web applications with AngularJS 2 that follows the standard of web development.
If you have any questions, then you can ask in the comment section below!
Recent Stories


Top DiscoverSDK Experts


Featured Products

Compare Products
Select up to three two products to compare by clicking on the compare icon () of each product.
{{compareToolModel.Error}}
{{CommentsModel.TotalCount}} Comments
Your Comment