Sponsors


Laravel Tutorial (Part 2)
This article will continue to where we left in out Part 1 of the Laravel tutorial series.
Laravel is a powerful MVC PHP framework, designed for developers who need a simple and elegant toolkit to create full-featured web applications. Laravel was created by Taylor Otwell. This is a brief tutorial that explains the basics of Laravel framework.
In this article, we will have a look at features available in Laravel, how to install it, the application structure it follows and the mode it works in. Let’s continue our journey to this awesome PHP Framework.
Laravel
Laravel framework offers many key features which will save you time if you are planning to develop a website from scratch. For example, it manages server session on its own, we don't have to explicitly define session variables on every web page. Framework handle cross site scripting, sql injections and other hacker attacks that can take place on websites. So, websites can be built in laravel in a secure manner and indulge with below key features :-
- Template Engine (Laravel Blade)
- Authentication
- Emailing
- Redis
- Queues
- Schema builder , migrations and seeding
- Query Builder and Eloquent ORM
- Routing Cache
- Contracts (Caching)
Laravel was launched in Nov ‘2014 . Laravel 4.2 was released as 1st version , followed by laravel 5.0 , laravel 5.1,laravel 5.2 .Currently we are using laravel 5.3 (Latest Version).
Since, laravel is an open source software, it’s kernel is hosted on GitHub. Therefore, allowing customisation and rewriting of any part of framework.
In a layman term a simple question came up - Why should I choose I laravel?
Why should I choose I laravel?
Here are some reasons why Laravel will be an excellent choice for our next world-changing application:
- It provides effective ORM and database layer .
- Easy integration with third party libraries (AWS).
- Very active and growing community that provides quick support and answers.
- Framework provides capability of async queue and background jobs for long running tasks.
- Manage cache on its own .
- Clean and simple routing .
- It provide interface for unit testing.
LARAVEL INSTALLATION
To get started with laravel, our first step is installing composer.
>>> Composer is an excellent PHP dependency management system.
Laravel uses composer for managing dependencies:
Step 1 - Visit the following URL and download composer
https://getcomposer.org/download/
Step 2 - After successful installation of composer, check installation by typing composer on the command prompt
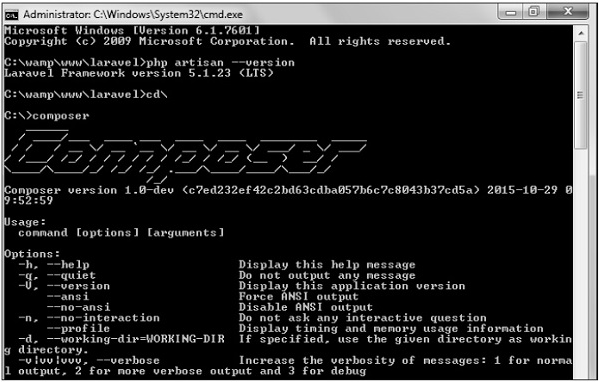
Step 3 - After successful installation of composer, check installation by typing composer on the command prompt.
Step 4 - Below command will install laravel. You can open a new laravel project in any IDE e.g., eclipse, netbeans, sublime etc.
composer create-project laravel/laravel –-prefer-dist <project name>
Step 5 - Give 777 permissions to bootstrap, storage and public folder. Theses folders are located at root of application directory structure.
Step 6 - For getting all laravel dependencies in the newly created project. Type composer install command on command prompt. It will create a vendor folder on laravel root. Vendor folder contains all the dependencies or libraries to make application up and running. Give 777 permission to laravel vendor folder.
Step 7 - Start the laravel service by executing the following command:
php artisan serve
Step 8 - After executing the above command, you will see a screen as shown below :-
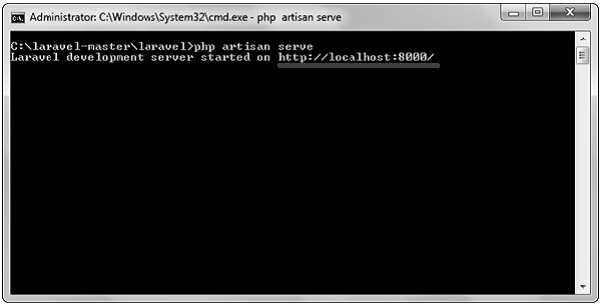
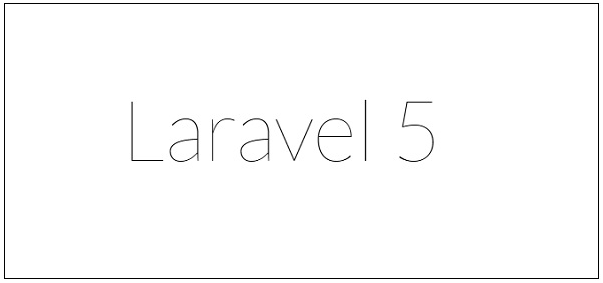
Step 9 - Copy the URL http://localhost:8000/ on a web browser and there it is, Laravel’s default landing page,
LARAVEL APPLICATION STRUCTURE
Now that we have Laravel installed, up and running, let’s move to its directory structure. Root directory of laravel contain various folders and files. Listed below are folders name and their use in application structure :-
- App - Core code of application is kept in app folder.
- Bootstrap - This folder contains application bootstrapping script.
- Config - This folder contains all the configuration files of the application.
- Database - This folder contains database migrations.
- Public - This folder is a application document root. It contains laravel index file from where the application starts. All assets of application like javascript files, images, css files etc are kept in a public folder.
- Storage - This folder contains all user generated files, all catching files created by application and application logs which are generated by application are stored here .
- Test - This folder contains files for unit test cases .
- Vendor - This folder contains all the composer dependencies that is all core libraries which are included in the laravel application structure.
- Resources - This folder contains all the assets of application, language conversion files and View files are kept here.
App Directory
This is a core folder where all core php code resides. App directory is by default named as “App”.To rename it you can execute the below command on command prompt
php artisan app: <name of your application>
It contains various of other folder and files as listed below :-
- Http : This folder contains a controller folder which further encloses files where we develop our business logic that is web service’s consume by http request.
- Exceptions: This folder contains files where we can bind exceptions thrown by web services or web applications.
- Jobs: This folder contains queueable jobs or processes which are created at runtime in application.
- Listeners: This folder contains listener classes which respond to events which are fired by application. It receives an event and can perform an action in response to that event. For example, if a user registers into application, so we create a User Registered event which performs an action of sending welcome email to this event.
- Providers: This folder contains various service providers.
- Policies: This folder contains policies of application to which one has to adhere while developing an application.
- Events: This folder stores events generated by application time to time. These events are used to alert other parts of application that a specific action has occurred.
- Console: This folder contains all the artisans commands that are executed on command prompt.
Resources Directory
- Assets: This folder contains all the assets like images, javascript, css files for application.
- Lang: This folder contains files using which multiple language support can be ensured for website and app developed using laravel framework.
- Views: This folder contains all html view files or laravel blade files.
Routes Directory
Routes of the application are defined in routes folder. It routes HTTP request to an appropriate controller and view .
Config Directory
After laravel is installed, first thing we require is to connect it to a local database. All these configurations are kept here or in hidden file on root directory of project named as .env.example. Rename it to .env and put all the necessary prerequisites for implementing database configuration. If you have installed laravel using composer, env file is automatically created on root directory of application.
All the environment configurations are kept in .env file. For example:-
APP_ENV=local
APP_KEY=base64:xwR15T+UBMogLG6d2E/QqdDy0aRuZZy31OAFW9wih2c=
APP_DEBUG=true
APP_LOG_LEVEL=debug
APP_URL=http://localhost
DB_CONNECTION=mysql
DB_HOST=127.0.0.1
DB_PORT=3306
DB_DATABASE=database name
DB_USERNAME=database user name
DB_PASSWORD=database user password
Above code is placed in .env file.
Maintenance Mode
As and when we need to add patches or modification into current hosted application, we can do it using laravel artisan commands . The two commands that need to be entered on command prompt is as follows :-
- When you need to push your application into maintenance mode
php artisan down
It will activate maintenance mode and all the requests to the server will be redirected to a single maintenance page as shown below :-

- When you need to stop maintenance mode and up your website you can enter below command on command prompt .
php artisan up
Your application will be up and running.
Conclusion
In this article, we continued our journey to setup Laravel and understanding its directory structure it provides for a scalable application.
There is a lot more to come which we will read in the Part 3 of our Laravel tutorial series.
Recent Stories


Featured Products
Compare Products
Select up to three two products to compare by clicking on the compare icon () of each product.
{{compareToolModel.Error}}
{{CommentsModel.TotalCount}} Comments
Your Comment