Sponsors


Git - Using Remote Servers in GitHub
In the last article, we learned about local commits. We covered how to create a repo from scratch, how to add different files to a commit, how we can check the commit with git status, how to execute the commit, and how we choose the changes with the git log.
Though it’s possible to work solely with local changes, in most cases we work with one or more servers that contain the remote version of our version control. And while it’s relatively easy to install a server that supports Git, most places now use a cloud service to store their Git data. One of the most popular systems is GitHub that allows every user to create multiple repositories and connect to them, and allows other users to see the changes, make copies of the repository, and contribute code. I’ll get into more detail about GitHub later on. There are other services that are similar to GitHub; the most well know is Atlassian, which is also excellent.
In order to keep learning, we’ll need to work on a remote server. If you don’t have a GitHub account, create one. Making an account is simple and easy through their site. After making the account and verifying your email, we make a new repo—essentially your first repository. It’s pretty easy.
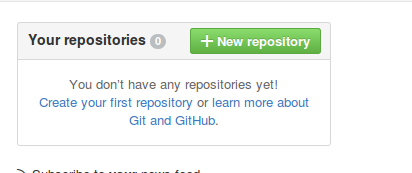
After logging in, click on new repository:
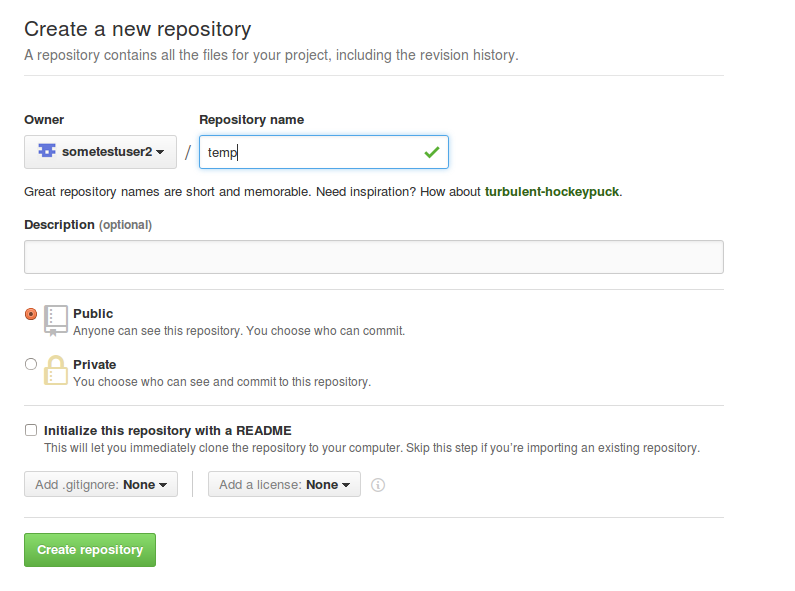
Then we’re taken to the screen where we can choose a name. For the sake of our examples, and to keep it simple, I’ll call it temp.
After successfully creating the repository, we get some instructions:

Git’s interface, like all interfaces, is updated and changed over time. But the basics should be pretty straightforward, like how to create a repository. After creating, we can push our code to the new repo that’s been created. Last time we wrote some code and ran commit. But this was a local commit. We can continue and work with the local, but if we’re working on a team, we want the rest of the team members to be able to see the code, and we’ll need to move the code from our local commits that we ran to the server. The process is called push. The first thing we need to do is connect our local repository to GitHub’s remote server. We do this with a command called git remote add, that takes two parameters. The first is the name of the server (generally origin, but we can call it anything) and the second is the git server’s address—in the case of our example https://github.com/sometestuser2/temp.git. This address is made up of my username and the name of the project. Every project on GitHub has this configuration.
When I run the command git remote add origin https://github.com/sometestuser2/temp.git in the local git folder, we are essentially saying to Git that from now on origin is the remote server that we want to use.
How do we know to which remote server our repo is connected? Run the command git remote -v:
$ git remote -v
origin https://github.com/sometestuser2/temp.git (fetch)
origin https://github.com/sometestuser2/temp.git (push)
We see that there is a remote server defined as origin for the push, and there’s a remote server defined as origin for the fetch, which is the update. Right now we’re interested in the push.
How do we run the push? Well, by using push. The command push also takes two parameters. The first is the name of the server that we chose (in this case it’s origin) and the second is the name of the branch. The name of the branch I’m working with I chose to call master. As such the command we’ll use will be git push origin master. GitHub will ask us for the username and password, which we set when we set up our account. If everything is OK, the entire process will look like this:
$ git remote add origin https://github.com/sometestuser2/temp.git
$ git push origin master
Username for 'https://github.com': XXXX@XXXX.com
Password for 'https://XXXX@XXXX.com@github.com':
Counting objects: 6, done.
Delta compression using up to 2 threads.
Compressing objects: 100% (2/2), done.
Writing objects: 100% (6/6), 488 bytes | 0 bytes/s, done.
Total 6 (delta 0), reused 0 (delta 0)
To https://github.com/sometestuser2/temp.git
* [new branch]      master -> master
If we go into the GitHub interface, we see that it’s been updated and contains the changes. If you worked with the previous guide, there will be just one PHP file. Now, anyone, anywhere around the world, can pull the changes (but not push changes, only you can do that). How do we pull the changes? Make a temporary file on your machine. We pull the changes using clone:
$ git clone https://github.com/sometestuser2/temp.gitCloning into 'temp'...
remote: Counting objects: 6, done.
remote: Compressing objects: 100% (2/2), done.
remote: Total 6 (delta 0), reused 6 (delta 0), pack-reused 0
Unpacking objects: 100% (6/6), done.
Checking connectivity... done.
All that the clone command takes is the URL of the remote server. Each GitHub project has one, including yours. What is it? We got it when we created the project, and have even defined it already. The URL is https://github.com/sometestuser2/temp.git and when we run clone, Git pulls the files, deploys them, and requests for us the remote origin for the same URL. If we have permission, we can start to work, make local changes as commits, and once we’re ready we can push them to the original.
It can be a little confusing at the beginning—this split between local and remote. As opposed to SVN or other systems, where we can only work with a server, here we work essentially locally (the commits) and with the server (push). It seems a bit of a pain to manage it, but it quickly becomes second nature. In the next article, we’ll take a look at branches and continue to explore the abilities of this powerful system.
About the author: Ran Bar-Zik is an experienced web developer whose personal blog, Internet Israel, features articles and guides on Node.js, MongoDB, Git, SASS, jQuery, HTML 5, MySQL, and more. Translation of the original article by Aaron Raizen.
Recent Stories


Top DiscoverSDK Experts


Featured Products
Compare Products
Select up to three two products to compare by clicking on the compare icon () of each product.
{{compareToolModel.Error}}
{{CommentsModel.TotalCount}} Comments
Your Comment