Sponsors


React - Component Design
In our last React article, we learned about more complex React components—with parameters and even with components nested inside one another. In this article, we’ll learn about how to design components. There are a few ways to do this and we’ll look at two of them here. The first way is a bit dumb—simply wrap the HTML that comes from the component in some silly class and then design as you like. It would look something like this:
<!DOCTYPE html>
<html>
<head>
<meta charset="utf-8">
<title>My first react app and component</title>
<script src="https://unpkg.com/react@16/umd/react.development.js"></script>
<script src="https://unpkg.com/react-dom@16/umd/react-dom.development.js"</script>
<script src="https://unpkg.com/babel-standalone@6.15.0/babel.min.js"></script>
<style>
.hello {
color: red;
}
</style>
</head>
<body>
<div id="content"></div>
<script type="text/babel">
class Hello extends React.Component {
render() {
return <p class='hello'>Hello {this.props.target}!!</p>
}
}
const target = document.getElementById('content');
ReactDOM.render(
<Hello target='world'/>,
target
);
</script>
</body>
</html>OK, well, it’s a bit embarrassing to use this method but it’s effective if you’re working on a Hello World application. In the real world though, using this method would result in having an incredibly bloated CSS file that contains all of the components. That’s not going to work for us. We normally avoid this by using a webpack and using import with the appropriate file. But I won’t get into this right now. There is another method that we should get to know which is to use JavaScript along with a magical React file which will make this method work.
The first way to do this is to create a design object in JavaScript. Something along these lines:
const helloStyle = {

     color: '#red',

     fontSize: '40px'

   };
If you’ve forgotten some of the basics in vanilla JavaScript, we’re talking about pretty old syntax through which one can set CSS in JavaScript. How does it work? If, for example, I have a CSS property with one name, let’s say color, it remains unchanged. If I have a CSS property with more than one name, it goes through a metamorphosis via upper case letters. For example, font-size becomes fontSize. It’s pretty easy once you get used to it but either way, there is an excellent table with translations of CSS properties from MDN. After we’ve created the object, we simply pass it with code using styles. Here is the obligatory example:
class Hello extends React.Component {
 render() {
   const helloStyle = {
     color: 'red',
     fontSize: '40px'
   };
   return <div style={helloStyle}>{this.props.children} {this.props.greetTarget}!</div>
 }
}

const target = document.getElementById('content');
ReactDOM.render(
 <hello greetTarget="World and Mars"><strong>Hello</strong></hello>,
 target
);
The key element of the code here is the
style={helloStyle}
Notice that it’s without quotation marks. React already knows how to take the object and convert it to inline CSS. Try it yourself!
So you may be asking yourself, “when will this be useful?” It’s particularly useful for parameters when we want to change design using JavaScript. For instance, something like this:
<!DOCTYPE html>
<html>
<head>
<meta charset="utf-8">
<title>My first react app and component</title>
<script src="https://unpkg.com/react@16/umd/react.development.js"></script>
<script src="https://unpkg.com/react-dom@16/umd/react-dom.development.js"</script>
<script src="https://unpkg.com/babel-standalone@6.15.0/babel.min.js"></script>
</head>
<body>
<div id="content"></div>
<script type="text/babel">
class Hello extends React.Component {
render() {
const helloStyle = {
color: this.props.greetColor,
fontSize: '40px'
};
return <div style={helloStyle}>Hello {this.props.greetTarget}!</div>
}
}
const target = document.getElementById('content');
ReactDOM.render(
<div>
<Hello greetColor="green" greetTarget="World and Mars" />
<Hello greetColor="purple" greetTarget="World and Mars" />
<Hello greetColor="gold" greetTarget="World and Mars" />
</div>,
target
);
</script>
</body>
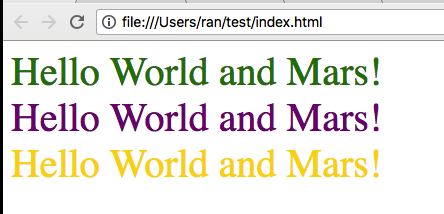
</html>The results are pretty cool—the same sentence in three different colors:
Don’t believe me? Well try it yourself. I didn’t give a live example on purpose. Copy the code above and paste it into your own codepen or another text editor (in codepen you don’t need the src or the head). You can’t learn just by reading—you have to get your hands dirty too.
Check back soon for the next article where we’ll be talking about components with states. Till then.
| Previous Article: React Components with Parameters | Next article: Stateful Components in React |
About the author: Ran Bar-Zik is an experienced web developer whose personal blog, Internet Israel, features articles and guides on Node.js, MongoDB, Git, SASS, jQuery, HTML 5, MySQL, and more. Translation of the original article by Aaron Raizen.
Recent Stories


Top DiscoverSDK Experts


Compare Products
Select up to three two products to compare by clicking on the compare icon () of each product.
{{compareToolModel.Error}}
{{CommentsModel.TotalCount}} Comments
Your Comment