Sponsors


Ionic 2 - side menu and tabs
Simplifying the conceptual mess regarding side menu and tabs in Ionic 2.
Assuming you have read my previous article, you might have wondered why I haven’t talked about side menu and tabs -- which are actually a very crucial aspect of Ionic 2. The reason for this is that I wanted to make the initial introduction as easy and accessible as possible, so that new developers don’t shy away from this awesome framework!
For the navigation, Ionic 2 supports side menu and tabs. What is side menu? Well, if you ever used any non-game Android application, then chances are you are already aware of it or probably seen it yourself. Basically, it is a menu that you open by sliding the screen to left/right or touching the icon on the top right/left of the screen. It usually contains all the pages or activities that are available in your application. For example, there could be a menu with “Settings” page, and “About” page, and so on.
Tabs on the other hand are kind of navigation to different pages of application(s) through simple titles of the pages, which is usually appeared on the navigation menu at the top of the application. Usually, Tabs give the feeling of web look, while the side menu gives the app-like experience, although there are exceptions.
In this article, I will talk about the side menu and tabs in Ionic 2, and which one to use and when to use it. Let’s get started!
Understanding side menu and tabs in Ionic 2
The templates that Ionic 2 provides by default contain tabs and sidemenu. We will start from our previous application and see how much we can add the functionality to the UI.
Creating a project
$ ionic start ionic-sidemenu sidemenu --v2This will create obnoxious (for the lack of a better word!) project with two pages: Page One and Page Two. You can do “ionic serve” to see the results. The default root is set to Page One, but you can click the button on the top left side OR the “Toggle Menu” to open the Menu of pages. Therein, you can visit the other page.
You can specify the menu with an ID or set its position. See more here: (https://ionicframework.com/docs/v2/api/components/menu/MenuToggle/).
If you notice, the page changing doesn’t change the link or address, because we are not changing routes! Pages are dynamically created, and so the second page reloads the screen on-the-fly. All this gives the app-like feeling as pages are treated as if they are activities in Android application.
If you use the Google Play Store, then you will also notice a similar menu on the left hand side, which contains the information of the account. Thus, Ionic 2 is following the standard or stereotype of Android UI components!
Delete the pages in “pages/” folder, because we don’t need these useless (sorry for those who wrote this template!) pages. So, first copy the “youtube” folder from the pages folder of our previous project, and then create a new page:
$ ionic generate page wikipedia
We will be using these two pages. We will implement the Wikipedia API (remember our AngularJS 2 HTTP tutorial?). First, copy the “wikipedia.service.ts” to “wikipedia/” folder. We won’t be modifying it. Now, copy the following content to “wikipedia.component.ts”:
wikipedia.component.ts
import { Component } from '@angular/core';
import { NavController, NavParams } from 'ionic-angular';
import { WikipediaService } from './wikipedia.service';

@Component({
  selector: 'page-wikipedia',
  templateUrl: 'wikipedia.html'
})
export class WikipediaPage {
   constructor(private wikipediaService: WikipediaService, public navCtrl: NavController, public navParams: NavParams) {}
   ionViewDidLoad() {
    console.log('ionViewDidLoad WikipediaPage');
  }
   items: Array<string>;
   Jsonitems: Array<string>;
   searchKey(input) {
    this.wikipediaService.searchKey(input).then(items => this.items = items);
  }
}
You can see that it is using WikipediaService. Now, copy the following content to “wikipedia.html”:
wikipedia.html
<ion-header>
<ion-navbar>
<button ion-button menuToggle>
<ion-icon name="menu"></ion-icon>
</button>
<ion-title>Wikipedia API</ion-title>
</ion-navbar>
</ion-header>
<ion-content padding>
<h2>Wikipedia Search</h2>
<p>Enter something in the field and see the asynchronous results!</p>
<input #input type="text" placeholder="Search" (keyup)="searchKey(input.value)">
<ul>
<li *ngFor="let item of items">{{item}}</li>
</ul>
<button ion-button secondary menuToggle>Toggle Menu</button>
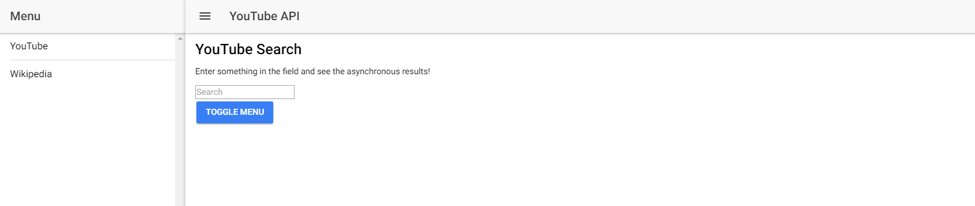
</ion-content>You can see that I have modified the default created HTML page; I have added a button icon on the top-left side and within the page as “Toggle Menu”.
If you open the “wikipedia.service.ts”, then you will see that it is using the “Jsonp” module in the constructor, so we need to include the module in the “imports” of “app.module.ts”. The following is the complete content of “app.module.ts”:
app.module.ts
import { NgModule, ErrorHandler } from '@angular/core';
import { IonicApp, IonicModule, IonicErrorHandler } from 'ionic-angular';
import { MyApp } from './app.component';
import { YoutubePage } from '../pages/youtube/youtube';
import { WikipediaPage } from '../pages/wikipedia/wikipedia';
import { youTubeServiceInjectables } from '../pages/youtube/youtube';
import { SearchResultComponent } from '../pages/youtube/youtube';
import { SearchBox } from '../pages/youtube/youtube';
import { WikipediaService } from '../pages/wikipedia/wikipedia.service';
import { JsonpModule } from '@angular/http';
@NgModule({
  declarations: [
    MyApp,
    YoutubePage,
    WikipediaPage,
                  SearchResultComponent,
                  SearchBox,
  ],
  imports: [
    IonicModule.forRoot(MyApp),
                  JsonpModule
  ],
  bootstrap: [IonicApp],
  entryComponents: [
    MyApp,
    YoutubePage,
    WikipediaPage,
                  SearchResultComponent,
                  SearchBox,
  ],
  providers: [youTubeServiceInjectables, WikipediaService, {provide: ErrorHandler, useClass: IonicErrorHandler}]
})
export class AppModule {}
The reason JsonpModule is included in “imports” and not in “declarations” is due to the fact that it’s a Module and not a component!
There won’t be much difference in “app.component.ts”, just change the pages names. Following is its complete contents:
app.component.ts
import { Component, ViewChild } from '@angular/core';
import { Nav, Platform } from 'ionic-angular';
import { StatusBar, Splashscreen } from 'ionic-native';
import { YoutubePage } from '../pages/youtube/youtube';
import { WikipediaPage } from '../pages/wikipedia/wikipedia';
@Component({
  templateUrl: 'app.html'
})
export class MyApp {
  @ViewChild(Nav) nav: Nav;
  rootPage: any = YoutubePage;
  pages: Array<{title: string, component: any}>;
  constructor(public platform: Platform) {
    this.initializeApp();
     // used for an example of ngFor and navigation
    this.pages = [
      { title: 'YouTube', component: YoutubePage },
      { title: 'Wikipedia', component: WikipediaPage }
    ];
  }
   initializeApp() {
    this.platform.ready().then(() => {
      // Okay, so the platform is ready and our plugins are available.
      // Here you can do any higher level native things you might need.
      StatusBar.styleDefault();
      Splashscreen.hide();
    });
  }
   openPage(page) {
    // Reset the content nav to have just this page
    // we wouldn't want the back button to show in this scenario
    this.nav.setRoot(page.component);
  }
}
We have set the rootPage as YoutubePage. The @ViewChild() is used to access the selector(s) of child component “Nav” while also accessing its methods in our component. <ion-menu> is used for creating menu. If you notice, the button has *ngFor="let p of pages" directive which simply inputs the total number of pages in the template by looping through all the pages. Our <ion-menu> selector is using the “content” from <ion-content>, so the change in it (which happens once the pages are changed) is reflected in our menu! Simple, right?
The openPage() method is defined in our component, which simply sets the current root to the current page, so whenever you click on it, it opens a new page. We have also created an Array called “pages” that simply holds all the pages together.
By default, the menu slides in from left, but you can change by passing right to the side property.
<ion-menu side="right" [content]=" content">...</ion-menu>
You can also set the menu types. Currently, there are three menu types supported by Ionic 2: overlay, reveal and push. By default, it is set to “overlay”, but you change it:
<ion-menu type="reveal" [content]=" content ">...</ion-menu>
Hell, you can even change the menu for specific platform, but you need to configure it in your “app.module.ts”, something like the following:
imports: [
  IonicModule.forRoot(MyApp,{
    menuType: 'push',
    platforms: {
      ios: {
        menuType: reveal,
      }
    }
  })
],
We are using the “content” as the reference in <ion-menu> which then we are using in <ion-nav>. You can see that I have disabled the “swipeBackEnabled”, but you can set it to true if you want. There are other properties as well which you can check from here (https://ionicframework.com/docs/v2/api/components/menu/Menu/).
Creating an HTTP JSON Reader
Let’s add another page:
$ionic generate page jsonparserWe are going to read the API provided by Yahoo Finance through HTTP. Copy the following content to “jsonparser.ts”:
jsonparser.ts
import { Component } from '@angular/core';
import { NavController, NavParams } from 'ionic-angular';
import { Jsonp } from '@angular/http';
@Component({
  selector: 'page-jsonparser',
  templateUrl: 'jsonparser.html'
})
export class JsonparserPage {
   constructor(private jsonp: Jsonp, public navCtrl: NavController, public navParams: NavParams) {}
   ionViewDidLoad() {
    console.log('ionViewDidLoad JsonparserPage');
  }
  getData() {
    this.jsonp.get('http://chartapi.finance.yahoo.com/instrument/1.0/NFLX/chartdata;type=quote;range=1d/json/?callback=JSONP_CALLBACK')
        .map(res => res.json())
        .subscribe(data => console.log(data));
  }
}
Now, copy the following content to “jsonparser.html”:
jsonparser.html
<ion-header>
<ion-navbar>
<button ion-button menuToggle>
<ion-icon name="menu"></ion-icon>
</button>
<ion-title>JSON Data Parser</ion-title>
</ion-navbar>
</ion-header>
<ion-content padding>
<h2>JSON Data Parser</h2>
<div>
<input #input type="submit" value="Submit" (click)="getData()">
</div>
<button ion-button secondary menuToggle>Toggle Menu</button>
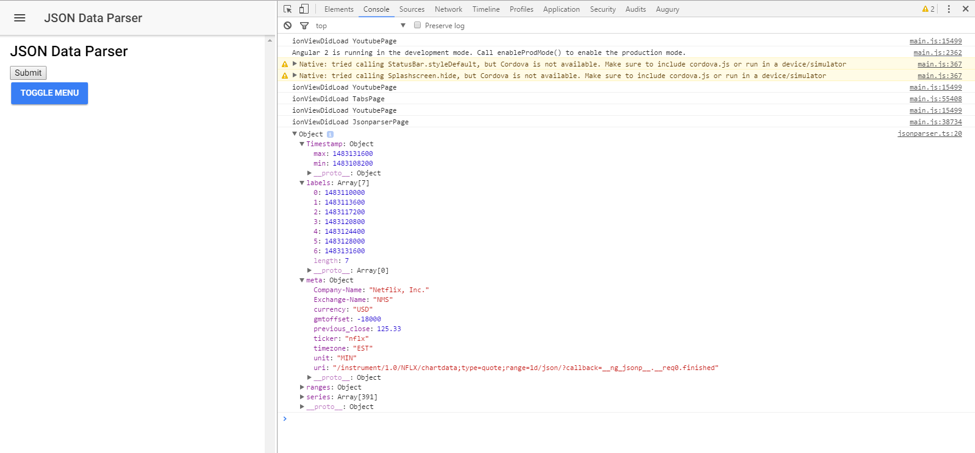
</ion-content>Make sure to include “JsonparserPage” in “app.module.ts”.
Now, if you click on “Submit” it will give you values in “Console” to play with.
About tabs…
As we have understood side menu, so now let’s see how tabs work in Ionic 2. You can run the following command to create a new project with tabs template:
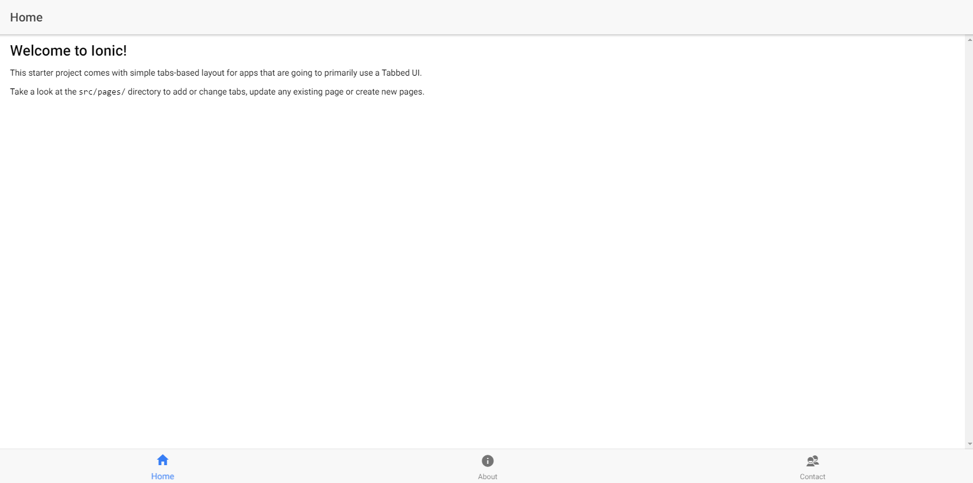
$ ionic start ionic-tabs tabs --v2But, it won’t provide much, but just 3 tab layout.
So, let’s add the tabs to our application. Create a new page:
$ ionic generate page tabsThe default code doesn’t contain anything related to tabs, so we need to write code manually. Copy the following content to “tabs.html”:
tabs.html
<ion-tabs>
  <ion-tab [root]="tab1Root" tabTitle="YouTube" tabIcon="home"></ion-tab>
  <ion-tab [root]="tab2Root" tabTitle="Wikipedia" tabIcon="information-circle"></ion-tab>
  <ion-tab [root]="tab3Root" tabTitle="JSONParser" tabIcon="contacts"></ion-tab>
</ion-tabs>
Here, the <ion-tabs> selector is used for highlighting the Tab components. The <ion-tab> is for specific Tab components. The [root] simply assigns the address to the root. The “tabTitle” is for setting the Title name, and “tabIcon” is for setting the Icon.
I have used the default icons provided by Ionic 2 for home, about and contact, but you can use your own icons. Basically you need to have a custom icon in SVG format, which you can then convert into .ico format, and then use SASS to generate your icon, and finally add the icon(s) to the Tab(s). I won’t cover the procedures here, but there is a good post about it on StackOverflow (http://stackoverflow.com/questions/38462885/add-custom-icon-in-ionic-2).
Now, copy the following contents to “tabs.ts”:
tabs.ts
import { Component } from '@angular/core';
import { NavController, NavParams } from 'ionic-angular';
import { YoutubePage } from '../youtube/youtube';
import { WikipediaPage } from '../wikipedia/wikipedia';
import { JsonparserPage } from '../jsonparser/jsonparser';
@Component({
  selector: 'page-tabs',
  templateUrl: 'tabs.html'
})
export class TabsPage {
  tab1Root: any = YoutubePage;
  tab2Root: any = WikipediaPage;
  tab3Root: any = JsonparserPage;
  constructor(public navCtrl: NavController, public navParams: NavParams) {}
  ionViewDidLoad() {
    console.log('ionViewDidLoad TabsPage');
  }
}
Make sure to add this page to “app.module.ts” and “app.component.ts”.
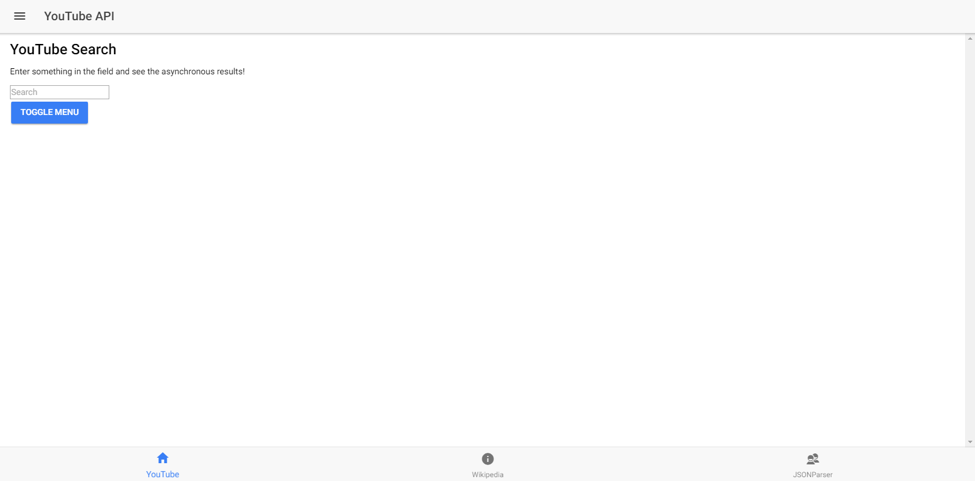
You can now see the “Tabs” page in the menu we have created earlier, but if you click on it, then you will see the tabs on the bottom of page.
By default, the first tab is selected when you visit the Tabs page. You change it by passing the “selectedIndex” value to <ion-tabs>, something like following:
<ion-tabs selectedIndex="2">
  <ion-tab [root]="tab1Root" tabTitle="YouTube" tabIcon="home"></ion-tab>
  <ion-tab [root]="tab2Root" tabTitle="Wikipedia" tabIcon="information-circle"></ion-tab>
  <ion-tab [root]="tab3Root" tabTitle="JSONParser" tabIcon="contacts"></ion-tab>
</ion-tabs>
This will select the third tab, because the index starts with 0.
The default position for the tabs is bottom for iOS and top for Android, but Ionic 2 was designed with iOS-first, that’s why you see it on the bottom. You can change the placement by adding “tabsPlacement” in IonicModule.forRoot() in “app.module.ts”, something like following:
IonicModule.forRoot(MyApp, {tabsPlacement: 'top'})
But, what if you want different placement for different platforms? Well, thankfully Ionic 2 have covered it for you already:
IonicModule.forRoot(MyApp, {
                  tabsPlacement: 'bottom',
                    platforms: {
                                   android: {
                                      tabsPlacement: 'top'
                                    },
                                    ios: {
                                      tabsPlacement: 'top'
                                    },
                                    windows:
                                    {
                                      tabsPlacement: 'top'
                                    }
                    }
                  })
There are several other properties that you can change like padding, font size, text color, etc. You can read more about here (https://ionicframework.com/docs/v2/api/components/tabs/Tabs/).
If you have trouble following the code, then you can visit the repository I have uploaded here (https://github.com/danyalzia/ionic2-menu-tab-play).
At this moment, I like to point out that side menu is great if you are building a standard application that contains several pages and configurations, as you can add as many pages as you want, and they will only be available once the user has clicked on the icon. On the other hand, Tabs are great for applications that do not have more than two or three pages, as they would fit neatly at the top or bottom of the page.
In this way, you can also deploy your applications to Ionic View, which is an app for Android and iOS that allows you to see/run the apps that are uploaded on the cloud storage of Ionic (https://apps.ionic.io/). You need to create an account on their site, once it is done AND the Ionic View is installed on your device, then do the following:
$ionic deployIt will ask your email and password, and then it will deploy to your cloud storage account, which then you can see through your mobile using Ionic View.
Conclusion
So, you can see the power of the side menu and tabs in Ionic 2. These are pretty much the building blocks of the UI in Ionic that everyone needs to be accustomed with if they are going to build complex applications. With just simple lines of code, one could create a lot of UI just in a moment!
If you have any trouble following the article, then please tell me in the comment section below!
Recent Stories


Top DiscoverSDK Experts


Featured Products

Compare Products
Select up to three two products to compare by clicking on the compare icon () of each product.
{{compareToolModel.Error}}
{{CommentsModel.TotalCount}} Comments
Your Comment