Sponsors


Babel - Creating a Scourcemap and Settings File
In the previous article we saw how to work with Babel in the real world—we created a project, installed a module with Node.js, wrote an ES2015 script (aka ECMAScript 6) in the scr folder and converted it to ES5, which is the previous standard that older browser and versions of Node know how to handle. The file that had JavaScript in the new standard was “compiled” to a file with ES5 code.
./node_modules/.bin/babel src -d lib --presets es2015 -wThis is the line we used. But this is bound to cause trouble. With Babel we can create a configuration file call .babelrc (notice the dot) in JSON format, and there we can make our presets, plugins, and more. First we just make a file call .babelrc and enter the following:
{
 "presets": ["es2015"],
}
From here out we can run Babel CLI specifying only the source and the destination, and of course the -w if we want Babel to track changes and recompile the JavaScript with each change.
./node_modules/.bin/babel src -d lib -wThere are still many other possibilities, for instance comments, which if we set to false will erase all the comments that were in the original version from the compiled file.
{
 "presets": ["es2015"],
 "comments": false
}
We can also set presets specific to various environments for Babel, production or development for instance.
{
 "presets": ["es2015"],
 "env": {
   "production": {
               "comments": false
   },
       "development" : {
               "comments": true
   }
 }
}
We can see that the presets are included in all of the environments, but in production in the compiled file, comments will not be present.
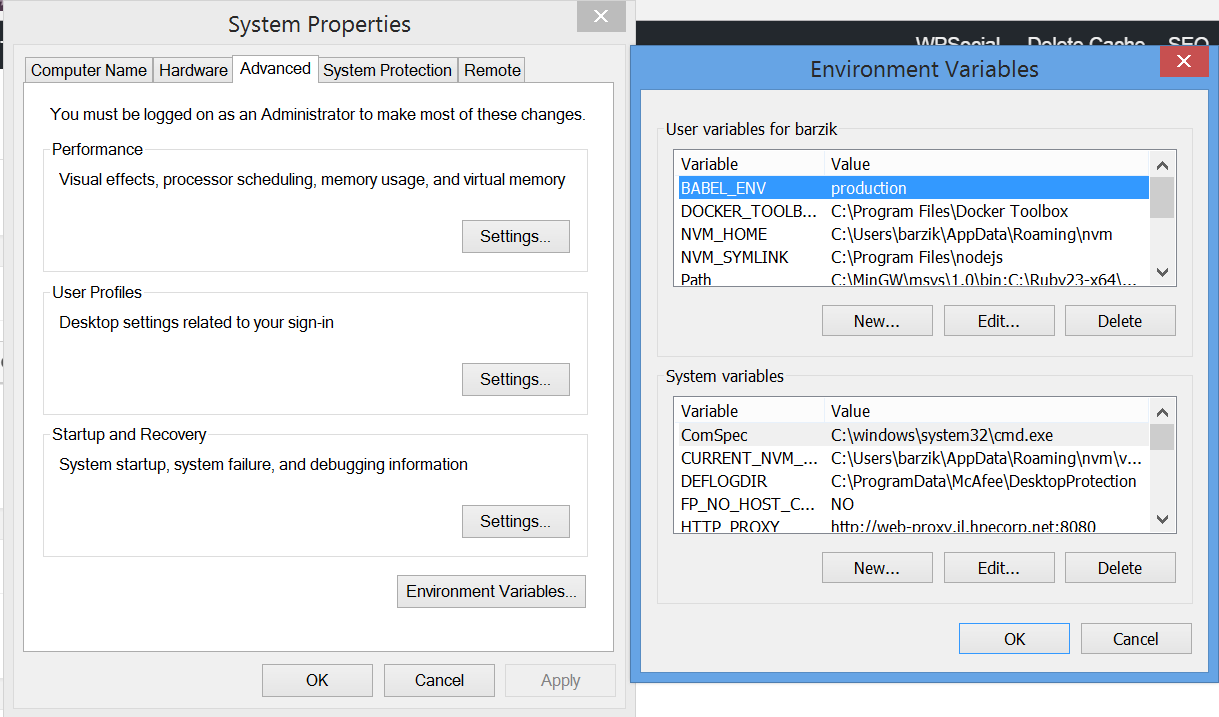
The environment is set by a environment variable called BABEL_ENV. In Linux it’s no problem to set environment variables and it done like this: BABEL_ENV=production
In Windows it’s done through a GUI in the Systems Properties
There are a few other possibilities like ignore, which prevents Babel from compiling files that relate to specific settings. For example, here, we are not allowing .spec files (a JS file used in testing) to be compiled by Babel:
{
 "presets": ["es2015"],
 "comments": false,
 "ignore": ["**/*.spec.js"]
}
There are many other possibilities, which can all be found in Babel’s documentation.
One of the most important options is sourcemaps—compiled files or parts of files that aid in debugging. Indeed, the code we see in the browser is compiled code, meaning it’s not the original code. So what happens when I want to run the debugger? Well here we have sourcemaps which is built-in to all browsers and allows us to view or debug the original JavaScript code. Check out the following code:
It’s made up of JavaScript and HTML. The HTML is pretty simple:
<!doctype html>
<html class="no-js" lang="">
   <head>
       <meta charset="utf-8">
       <meta http-equiv="x-ua-compatible" content="ie=edge">
   </head>
   <body>
               <input id="myInput" type="text" />
               <div id="container"></div>
       <script src="lib/index.js"></script>
   </body>
</html>
The JavaScript is also straightforward. There’s an event handler assigned to the input. The assignment is through a ES6 lambda function, also called an arrow function:
let container = document.getElementById('container'),

       myInput = document.getElementById('myInput');


myInput.addEventListener('input', ev => {

       container.innerHTML = myInput.value;

});
Babel will convert this to ES5 which all browsers can handle. The results will look something like this:
'use strict';

var container = document.getElementById('container'),

   myInput = document.getElementById('myInput');


myInput.addEventListener('input', function (ev) {

       container.innerHTML = myInput.value;

});
If we want to debug the original file, we’ll need the sourcemap, a file that maps the compiled code to the original pre-compiled code. We’ll see something like this in the debugger:
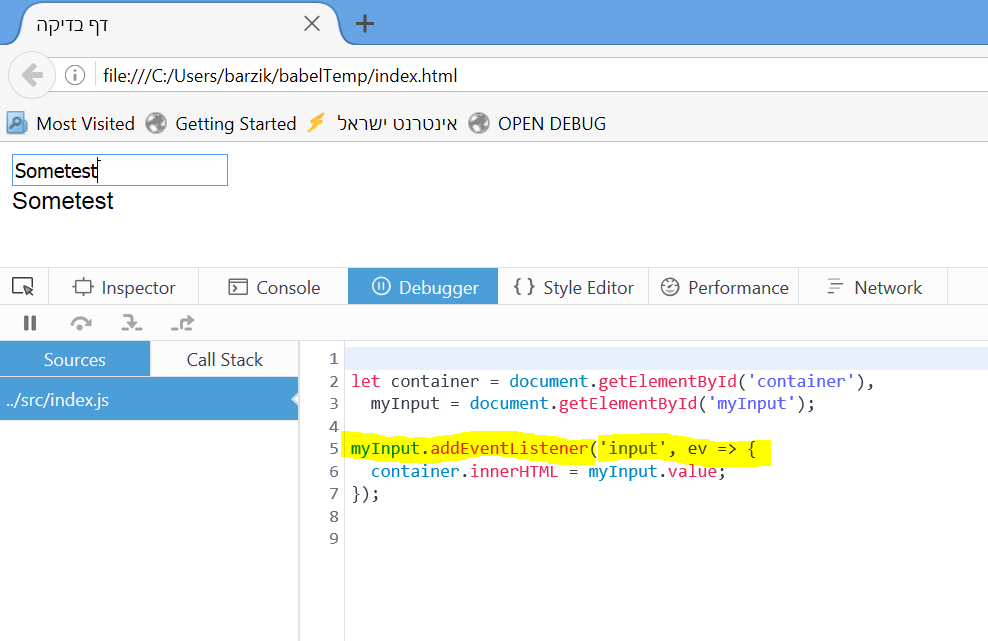
Debugging the compiled code. Note that what appears in the debugger is not the compiled code but rather the original code. How? With the sourcemap!
Instead of looking at the compiled code which can be problematic, we look at the original code—the code written in ES2015! This little piece of magic is called the sourcemap.
If we put something like the code below in the settings in the .babelrc:
{
 "presets": ["es2015"],
 "comments": false,
 "sourceMaps": "inline"
}
we’ll see in the compiled code something like this:
//#

sourceMappingURL=data:application/json;base64,eyJ2ZXJzaW9uIjozLC......
Just a bunch of gibberish. But this is actually what the browser uses to link between the compiled and uncompiled code, and what allows us to view the uncompiled code in the debugger. So if you’re still running Babel without gulp\grunt\webpackage, you should use inline and not other settings. This way all the information will be printed automatically, and if the files are not too big there shouldn’t be any problems.
Of course sourcemap is only relevant to the development environment and not to production!
About the author: Ran Bar-Zik is an experienced web developer whose personal blog, Internet Israel, features articles and guides on Node.js, MongoDB, Git, SASS, jQuery, HTML 5, MySQL, and more. Translation of the original article by Aaron Raizen.
Recent Stories


Top DiscoverSDK Experts


Featured Products


Compare Products
Select up to three two products to compare by clicking on the compare icon () of each product.
{{compareToolModel.Error}}
{{CommentsModel.TotalCount}} Comments
Your Comment