Sponsors


Python Image Processing With OpenCV
There are many image processing packages for Python. One of them is the PIL, and comes with the distribution Anaconda. worthwhile to take a glimpse of it. It contains basic image processing capabilities, and convenient to use.
Also ndimage.scipy is a module that contains many functions for processing
Photos.
misc.scipy module contains functions for reading and writing Photos.
However OpenCV image processing package is very common and accepted,
Is considered the most powerful, and contains many functions for image processing and video.
OpenCV package does not come with Anaconda, so we need to be install it separately, but installation is very easy.
Please download the package from the following link.
Extract the downloaded file and copy the file cv2.pyd at opencv/build/python
Copy the desired file to the following folder tree of Python:
Anaconda Users will find it here: c:\Anaconda\Lib\site-packages
Let’s check if the installtion succeeded:
In [2]: import cv2
In [3]: cv2.__version__
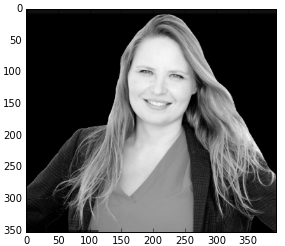
Out[3]: '3.1.0'Called and a represent the image SDK.jpg. Here's the code:

 import numpy as np
 import matplotlib.pyplot as plt
 import cv2

img = cv2.imread('C:\Users\USER\Desktop\image.jpg',0)
cv2.imshow('image', img)
cv2.waitKey(0)
cv2.destroyAllWindows()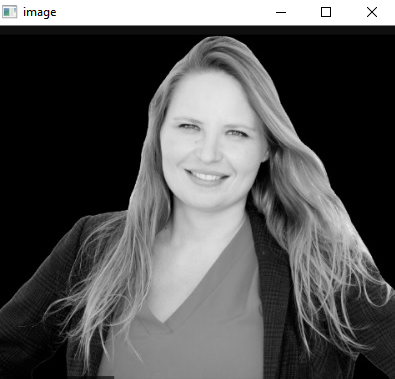
In line 3 we import the OpenCV.
In line 4 we read the image. Command cv2.Imread() accepts another argument in addition to the file name, and it can be: a color image, transparency and more:
Important: Many operations in OpenCV not throw exception if they
Fail, and therefore need to check the outcome of the action before proceeding.
For example, the act cv2.Imread not throw exception if the file not found, but returns None! therefore we need to check if the picture which is returned Isn’t None.
If we won’t do so, we will receive, probably, exception at a later stage when
we will try to process the None image.
At line 5 we present the image on the linguistic OpenCV system
The command opens a window with the title 'image' and shows the
Picture in it.
we will presents photos by Matplotlib and not by openCV:
import matplotlib.pyplot as plt
img = cv2.imread('C:/Users/USER/Desktop/image.jpg')
plt.imshow(img)
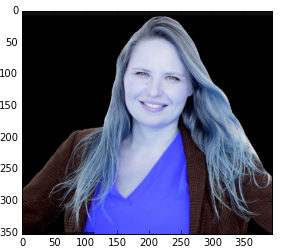
If we will compare to the previous program image, the color is wrong.
This is because the format of the image obtained in Imread.cv2() is BGR
Instead RGB.
img is a three-dimensional array of numpy:
type(img)
Out[25]: numpy.ndarray

img.shape
Out[26]: (353L, 395L, 3L)

plt.imshow(img[..., ::-1])
Out[35]: <matplotlib.image.AxesImage at 0xef6fb00> 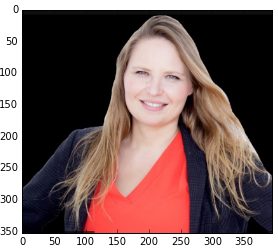
Imshow.plt() performs interpolation on the points to
Smooth the image. We can avoid it by moving the argument
'None =' interpolation. But we don’t have to do so if
Photos look nice and sensible, as in this case.
If we read the photo as gray level image:
img = cv2.imread('C:\Users\USER\Desktop\image.jpg',0)We get two-dimensional array:
img = cv2.imread('C:/Users/USER/Desktop/a1.jpg',0)

In [33]: img.shape
Out[37]: (353L, 395L)
In this case we need to provide color map to Imshow.plot(),
Otherwise this is what we get:
plt.imshow(img)
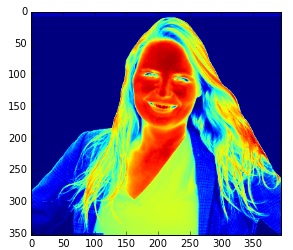
Here is the correct picture ":
Fixation color map
We can fix the color map by the next command:
plt.set_cmap('gray')
Then you can call Imshow.plot() without specifying a color map.
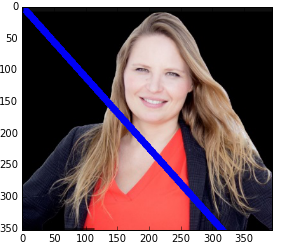
Painting the picture
There are painting functions that get the picture as a numpy array,
Change the array and return it.
img = cv2.imread('C:\Users\USER\Desktop\image.jpg')

e, r = img.shape[:2]

img = cv2.line(img, (0,0), (e, r), 245, thickness=10)

plt.imshow(img[...,::-1])
Line function accepts a starting point, end point, color
And other arguments. So we drew a blue line:
Basic mathematical operations
We will increase value by 45 (using broadcasting):
In [108]: img = cv2.imread('C:\Users\USER\Desktop\image.jpg')

In [109]: img += 45

In [110]: plt.imshow(img[...,::-1])
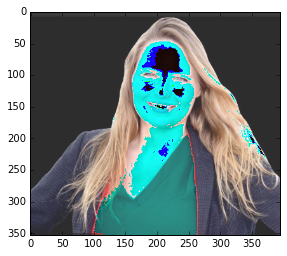
The addition causes to modulo when exceeds 255.
In contrast function Add.cv2() Addding until reaching a maximum value
And obtaining saturation. This function can’t use
broadcasting, so we’ll connect img sized image but contains
45 anywhere, by the function np.full or np.full.like
I used 150 instead of 45 for a clearer result:
img2 = cv2.add(img, np.full_like(img, 150, dtype=np.uint8))
plt.imshow(img2[...,::-1])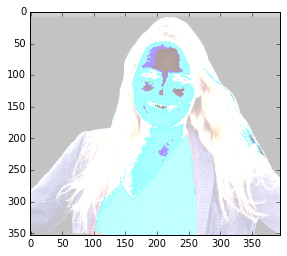
image processing
We have learned the basics of OpenCV, now let's move to Image processing.
Transformations
the Images we work with in this chapter are quite large:
You can resize the image. We’ll reduce their size (without having to maintain the right length and the width ratio):
img = cv2.imread('C:\Users\USER\Desktop\image.jpg')

SDK.shape
Out[119]: (353L, 395L, 3L)
We will use the resize() function with Width
150 Length 350
img2 = cv2.resize(img,(350,150))

img2.shape
Out[62]: (150L, 350L, 3L)

plt.imshow(img2[...,::-1])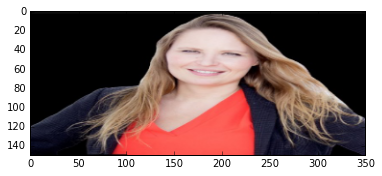
Convolution
is one of the first studying in image processing, this basic action is common and useful.
What is the convolution processing of image?
We define a two-dimensional array, for example, this:
Define kernel divisible by 9:
kernel = np.ones((3,3)) / 9

kernel
Out[64]:
array([[ 0.11111111,  0.11111111,  0.11111111],
       [ 0.11111111,  0.11111111,  0.11111111],
       [ 0.11111111,  0.11111111,  0.11111111]])
Performs convolution with the function Filter2d:
img2 = cv2.filter2D(img, -1, kernel)
plt.imshow(img2[...,::-1])
The second argument is -1, we will not deal with it.

Sometimes we want to make a blur, it Equivalent to a low pass, filter noise.
It seems a smart choice of values in the kernel provides a variety of Interesting filters on a pictures.
For example, the following kernel:
kernel_img2 = np.array([[1, 1, 1, 1, 1],
[1, -1, 1, -1, 1], [-1, -1, -1, -1, -1]])

img3 = cv2.filter2D(img, -1,kernel_img2)

plt.imshow(img3[...,::-1])
Out[68]: <matplotlib.image.AxesImage at 0x11c4cfd0>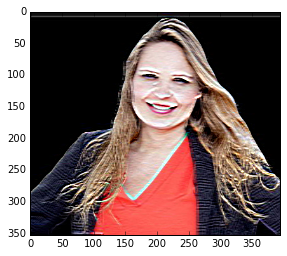
And another one:
kernel_SDK2 = np.array([[1, -1, 1, -1, 1],[0, 0, 0, 0, 0],
 [1, -1, -1, 1, -1]])

kernel_img2

Out[74]:
array([[ 1, -1,  1, -1,  1],
       [ 0,  0,  0,  0,  0],
       [ 1, -1, -1,  1, -1]])


img3 = cv2.filter2D(img, -1,kernel_img2)

plt.imshow(img3[...,::-1])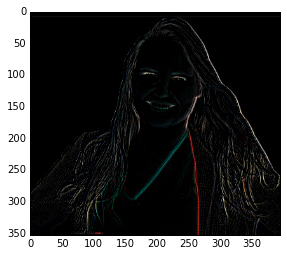
This filter works well at horizontal borders, and worse at borders in other directions. In order to find better boundaries, you can run some types of filters on the original image and unite the results
) The or oparation on pictures by cv2.bitwise_or(), for example.
There are functions in OpenCV that perform convolution filter with
known kernels, and all you need is to provide the function the size of the
kernel, and there are functions that perform other actions in addition to the
Convolution.
Let’s examine two such functions:
We will create random values in a two-dimensional array contains the dimensional image. Very important to create an Uint8.np type array, such as the type of the image, otherwise things are not working well and it is very difficult to know why.
p = np.random.randint(0, 255, SDK.shape[:2]).astype(np.uint8)We cancel the noise in most places.
p[p > 15] = 0Now we turn the picture to a BGR image so that all the color components are the same:
p = np.dstack((p, p, p))

p.shape
Out[77]: (353L, 395L, 3L)
Add the noise to the picture:
img_noise = img2 + p
plt.imshow(img_noise[...,::-1])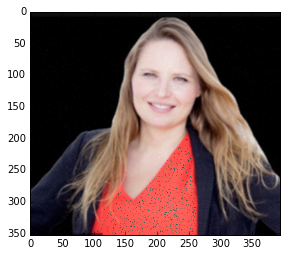
We'll clean up the image using the blur filter, go-kernel-size 3x3
img_blur = cv2.blur(img_noise, (3,3))
plt.imshow(img_blur[..., ::-1])

Now we try to filter MedianBlue which placing in the resulting pixel
The median value of the surrounding pixels. This function works with
Squares kernel, therefore receives a single number that describes the size of the kernel which need be odd:
img_medianBlur = cv2.medianBlur(img_noise, 3)
plt.imshow(img_medianBlur[..., ::-1])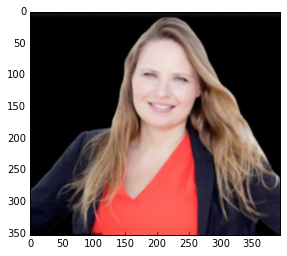
We succeed to clean the picture. however, we have received unwanted blurring associated with the picture resolution settings.
Recent Stories


Top DiscoverSDK Experts


Compare Products
Select up to three two products to compare by clicking on the compare icon () of each product.
{{compareToolModel.Error}}
{{CommentsModel.TotalCount}} Comments
Your Comment