Sponsors


Ionic 2 – Using Slides and Firebase
When you’re surfing the internet, you often hit websites that require you to either fill out some form or answer complete a survey. Such websites store your answers for analysis purposes, but many websites actually integrate tests in the form of questions and answers, perhaps for learning purpose or if they offer some online courses, then they might test their readers through such tests.
Ionic 2 provides several components by default, so one can easily imitate an original quiz application from anywhere on the internet and create something out of the randomness of Ionic 2. In fact, we can also create our components, but most importantly, Ionic 2 supports the Slides component (using <ion-slides>) that basically allows you to integrate as many slides as you want on your page (we will see later on it).
But then it feels boring to “play” the quiz game when there is a small amount of questions, especially when those questions have been hardcoded in the application so there is no way to add new questions. Thankfully, with the integration of Firebase, we can add questions to a JSON database on Firebase and make a service that updates the questions dynamically.
With this method, users can add their questions on-the-fly using the view/UI in the application. So for example, there might a page for creating new questions that will update the JSON database on Firebase, and another page for actually executing the test with those questions. We can also provide the login and authentication, so only those who have logged-in successfully can add new questions.
In this article, I am going to build a quiz application that will be updated dynamically through Firebase integration. Let’s get started!
Creating a dynamic general knowledge quiz application in Ionic 2 – Using Slides and Firebase
If you’ve been following our series on Ionic 2, then you know that I have already written about Firebase integration and how to read/update the data on JSON. We’ll be implementing a similar solution as we did earlier.
For the creation of a new question page, we will take help from our Todo application we created, wherein we will use the Modal (precisely ModalController) to create a kind of page on top of our page for taking the input on questions and the answers.
We also need to integrate the authentication, so only those who are logged-in to the site can actually create new questions and run them subsequently.
So, we not only need a login page (sign-in), but also a page from which a user can register the account (sign-up).
As I mentioned earlier, for the test/quiz, we would use <ion-slides> for creating the slides of different questions which allow you to integrate all the questions in the form of slides within a single page, so the users can simply “slide” the page to reach the other slides (we will look at this later).
Creating a project
First, let’s create a new project:
$ionic start ionic-quiz blank –v2
Once the project is created, make sure that your “app.html” and “app.component.ts” files are configured correctly for the page’s navigation (see our previous applications for the code).
Now, let’s create two providers:
$ionic g provider data
$ionic g provider user
In “src/providers” go into our respective provider folders, and rename the file to “{{name}}.service.ts” from “{{name}}.ts”. This is done in order to follow the norms of our previous applications where we used these services with these filenames.
Open the “data.service.ts” and copy the following content:
data.service.ts
import {Injectable} from '@angular/core';
import firebase from 'firebase';
import { Storage } from '@ionic/storage';
import { Http } from '@angular/http';
import 'rxjs/add/operator/map';

@Injectable()
export class DataService {
   public db: any;
       data: any;

   constructor(public storage: Storage, public http: Http) {}

   init() {
        // You need to change the config settings for your project
        const config = {
            apiKey: "AIzaSyBB4MH_Bm2NIut795lOiPY0Zc7jeOdZyns",
            authDomain: "quiz-app-ionic.firebaseapp.com",
            databaseURL: "https://quiz-app-ionic.firebaseio.com",
            storageBucket: "quiz-app-ionic.appspot.com",
            messagingSenderId: "295696917089"
        };
        firebase.initializeApp(config);

        this.db = firebase.database().ref('/');
   }

    getQuestionData() {
        return this.storage.get('questions');
   }
}
Here, we have initialized the configuration of our Firebase project. We created the project from Firebase console, so you need to create your own project and edit the settings (for the instructions refer to our previous articles).
Now, open “user.service.ts” and copy the following content:
user.service.ts
import {Injectable} from '@angular/core';
import firebase from 'firebase';

@Injectable()
export class UserService {
   public auth: any;
   constructor() {
       this.auth = firebase.auth();
   }
   public login(userEmail: string, userPassword: string) {
       return new Promise((resolve, reject) => {
           this.auth.signInWithEmailAndPassword(userEmail, userPassword)
               .then(userData => resolve(userData),
                   err => reject(err));
       });
   }
   public logout() {
       return this.auth.signOut();
   }
}
This code should be easy to understand, as we have simply integrated the authentication service using Promises.
Now, we need to create several pages:
$ionic g page signin
$ionic g page signup
$ionic g page quiz
$ionic g page questions
$ionic g page questions-add
$ionic g page questions-info
Make sure that these pages are included in “app.component.ts” and “app.module.ts”. Also, your “home.html” should look follows:
home.html
<ion-header>
 <ion-navbar>
   <button ion-button menuToggle>
     <ion-icon name="menu"></ion-icon>
   </button>
   <ion-title>Home</ion-title>
 </ion-navbar>
</ion-header>
<ion-content padding>
 This is an example project of Ionic 2 demonstrating the quiz and slides component feature.
</ion-content>
Before editing our pages, let’s first create few helper classes. In your “src/app/” directory, create a new file “auth.guard.ts” and copy the following content:
auth.guard.ts
import { Injectable } from "@angular/core";
import { AuthService } from "./auth.service";

@Injectable()
export class AuthGuard {
 constructor(private authService: AuthService) {}
 canActivate() {
   return this.authService.isAuthenticated();
 }
}
In the same directory, create a new file “auth.service.ts” and copy the following content:
auth.service.ts
import { Injectable } from "@angular/core";

export interface User {
   email: string;
   password: string;
   confirmPassword?: string;
}
import firebase from 'firebase';

@Injectable()
export class AuthService {
 constructor() {
 }
 signupUser(user: User) {
   firebase.auth().createUserWithEmailAndPassword(user.email, user.password)
     .catch(function (error) {
       console.log(error);
     });
 }

 signinUser(user: User) {
   firebase.auth().signInWithEmailAndPassword(user.email, user.password)
     .catch(function (error) {
       console.log(error);
     });
 }
 logout() {
   firebase.auth().signOut();
   //this.router.navigate(['/signin']);
 }

 isAuthenticated() {
   var user = firebase.auth().currentUser;
   if (user) {
     return true;
   } else {
     return false;
   }
 }
}
Make sure all these pages/components are included in “app.component.ts” and “app.module.ts”.
Now, open the “src/pages/signin/signin.ts” and copy the following code:
signin.ts
import { Component, ChangeDetectorRef } from '@angular/core';
import { BehaviorSubject } from 'rxjs/Rx';

import { DataService } from '../../providers/data/data.service';
import { UserService } from '../../providers/user/user.service';
import { ShowdataPage } from '../showdata/showdata';

import { NavController } from 'ionic-angular';
@Component({
 selector: 'page-signin',
 templateUrl: 'signin.html'
})
export class SigninPage {

public userEmail: string;
    public userPassword: string;
    public authStatus: boolean;
    public message: string;

    private isAuth: BehaviorSubject<boolean>;
   constructor(public nav: NavController, private data:DataService, private user:UserService, private cd:ChangeDetectorRef) {
        this.nav = nav;
        this.isAuth = new BehaviorSubject(false);

        this.isAuth.subscribe(val => this.authStatus = val);
    }
    ionViewDidLoad() {
        console.log('ionViewDidLoad SigninPage');

        this.user.auth.onAuthStateChanged(user => {
            this.isAuth.next(!!user);
            this.cd.detectChanges();
        });
    }

    public logout() {
        this.user.logout()
    }
    public login() {
        this.user.login(this.userEmail, this.userPassword)
    }

   ngOnInit():any {
   }
}
This code should look similar to you, as we have implemented this in our previous projects. Basically, we have defined the methods for logging in and logging out, and then we are checking the authentication.
Now, open “signin.html” and copy the following code:
signin.html
<ion-header>

   <ion-navbar>
   <button ion-button menuToggle>
     <ion-icon name="menu"></ion-icon>
   </button>
   <ion-title>Sign-in</ion-title>
 </ion-navbar>
</ion-header>

<ion-content padding>
<div *ngIf='!authStatus'>
    <h3>You need to login to see the data</h3>
   <form (ngSubmit)="login()">
       <ion-list>
           <ion-item>
               <ion-label stacked>Email</ion-label>
               <ion-input [(ngModel)]="userEmail"
                          type="email" name="userEmail"></ion-input>
           </ion-item>

           <ion-item>
               <ion-label stacked>Password</ion-label>
               <ion-input [(ngModel)]="userPassword"
                          type="password" name="userPassword"></ion-input>
           </ion-item>
           <hr/>
           <button type="submit" ion-button>Login!</button>
       </ion-list>
   </form>
    </div>
    <div *ngIf='authStatus'>
        <button (click)='logout()' ion-button>Logout</button>
    </div>
</ion-content>
This code should be self-explanatory.
Now, open “signup.ts” and copy the following code:
signup.ts
import { Component, OnInit } from '@angular/core';
import { NavController, NavParams } from 'ionic-angular';
import { FormBuilder, FormGroup, Validators, FormControl } from "@angular/forms";

import { AuthService } from "../../app/auth.service";
@Component({
 selector: 'page-signup',
 templateUrl: 'signup.html'
})
export class SignupPage implements OnInit {

 constructor(public navCtrl: NavController, public navParams: NavParams, private fb: FormBuilder, private authService: AuthService) {}
 ionViewDidLoad() {
   console.log('ionViewDidLoad SignupPage');
 }

 myForm: FormGroup;
   error = false;
   errorMessage = '';
   onSignup() {
     this.authService.signupUser(this.myForm.value);
   }

   ngOnInit(): any {
       this.myForm = this.fb.group({
           email: ['', Validators.compose([
               Validators.required,
               this.isEmail
           ])],
           password: ['', Validators.required],
           confirmPassword: ['', Validators.compose([
               Validators.required,
               this.isEqualPassword.bind(this)
           ])],
       });
   }
   isEmail(control: FormControl): {[s: string]: boolean} {
       if (!control.value.match(/^\w+@[a-zA-Z_]+?\.[a-zA-Z]{2,3}$/)) {
           return {noEmail: true};
       }
   }

   isEqualPassword(control: FormControl): {[s: string]: boolean} {
       if (!this.myForm) {
           return {passwordsNotMatch: true};
       }
       if (control.value !== this.myForm.controls['password'].value) {
           return {passwordsNotMatch: true};
       }
   }

}
Here, we are using the Forms to get the input of email and password; the rest should be easy to understand at this stage.
Now, open the “signup.html” and copy the following code:
signup.html
<ion-header>
 <ion-navbar>
   <button ion-button menuToggle>
     <ion-icon name="menu"></ion-icon>
   </button>
   <ion-title>Sign-up</ion-title>
 </ion-navbar>
</ion-header>
<ion-content padding>
<h3>Sign-up to edit the questions</h3>

<form [formGroup]="myForm" (ngSubmit)="onSignup()">
     <ion-item>
       <ion-label>E-Mail</ion-label>
       <ion-input formControlName="email" type="email" id="email" #email class="form-control"></ion-input>
        <span *ngIf="!email.pristine && email.errors != null && email.errors['noEmail']">Invalid mail address</span>
     </ion-item>
     <ion-item>
       <ion-label>Password</ion-label>
       <ion-input formControlName="password" type="password" id="password" class="form-control"></ion-input>
     </ion-item>
     <ion-item>
       <ion-label for="confirm-password">Confirm Password</ion-label>
       <ion-input formControlName="confirmPassword" type="password" id="confirm-password" #confirmPassword class="form-control"></ion-input>
        <span *ngIf="!confirmPassword.pristine && confirmPassword.errors != null && confirmPassword.errors['passwordsNotMatch']">Passwords do not match</span>
     </ion-item>
     <button ion-button type="submit" [disabled]="!myForm.valid">Sign up</button>
   </form>
</ion-content>
This code should be self-explanatory.
Before editing our quiz page, let’s first focus on getting the data from the JSON on Firebase and integrating our add/delete questions functionality.
Open the “question.ts” and copy the following content:
question.ts
import { Component } from '@angular/core';

import { NavController } from 'ionic-angular';
import { ModalController } from 'ionic-angular';

import { DataService } from '../../providers/data/data.service';
import { QuestionsAdd } from '../questions-add/questions-add'
import { QuestionsInfo } from '../questions-info/questions-info';

import { ChangeDetectorRef } from '@angular/core';
import { BehaviorSubject } from 'rxjs/Rx';
import { UserService } from '../../providers/user/user.service';

import firebase from 'firebase';
@Component({
 selector: 'page-questions',
 templateUrl: 'questions.html'
})
export class QuestionsPage {
    // For Login
    public userEmail: string;
    public userPassword: string;

    public authStatus: boolean;
    public message: string;
    private isAuth: BehaviorSubject<boolean>;

    public questionArray: any;

    ionViewDidLoad() {
        console.log('ionViewDidLoad QuestionsPage');
        this.user.auth.onAuthStateChanged(user => {
            this.isAuth.next(!!user);
            this.cd.detectChanges();
        });
    }
    public items = [];

    constructor(public navCtrl: NavController, private data: DataService, public modalCtrl: ModalController, private user:UserService, private cd:ChangeDetectorRef) {

        this.isAuth = new BehaviorSubject(false);

        this.isAuth.subscribe(val => this.authStatus = val);

        this.data.getQuestionData().then((questions) => {
        if(questions){
            this.items = JSON.parse(questions);
        }

        });

        this.showData();
    }
    showData() {
        var self = this;

        var user = firebase.auth().currentUser;

        if (user) {
         // User is signed in.
         this.userEmail = user.email;
        } else {
         // No user is signed in.
        }
        var ref = firebase.database().ref('/questions/');
        ref.once('value').then(function(snapshot) {
            // We need to create this array first to store our local data
            let rawList = [];
            snapshot.forEach( snap => {
                //if (snap.val().email == self.userEmail) {
                    rawList.push({
                     id: snap.key,
                     questionText: snap.val().questionText,
                     firstChoice: snap.val().firstChoice,
                     secondChoice: snap.val().secondChoice,
                     thirdChoice: snap.val().thirdChoice,
                     fourthChoice: snap.val().fourthChoice,
                     correct: snap.val().correct
                    });
                //}

                // This is for debugging, you can remove the code if you want
                console.log("Rawlist questionText: " + snap.val().questionText);
                console.log("Rawlist firstChoice: " + snap.val().firstChoice);
                console.log("Rawlist secondChoice: " + snap.val().secondChoice);
                console.log("Rawlist thirdChoice: " + snap.val().thirdChoice);
                console.log("Rawlist fourthChoice: " + snap.val().fourthChoice);
                console.log("Rawlist correct: " + snap.val().correct);
         });

            self.questionArray = rawList;
        });
    }

    addQuestion(){
        let addModal = this.modalCtrl.create(QuestionsAdd);

        addModal.onDidDismiss((item) => {
            if(item){
                this.storeQuestion(item);
                this.showData();
            }
        });
        addModal.present();
    }

    storeQuestion(item){
        this.items.push(item);
    }
    showQuestion(item){
        // Let's pass the item param
        this.navCtrl.push(QuestionsInfo, {
         item: item,
         "parentPage": this
        });
    }

    public logout() {
        this.user.logout()
        this.showData();
    }
    public login() {
        this.user.login(this.userEmail, this.userPassword)
        this.showData();
    }
}
Here, we are adding the questions data in our array, which we will use to print the values in our HTML side. Then we are using the ModalController to create a new Modal within the page for adding the new questions. This should look similar to our Todo application’s code.
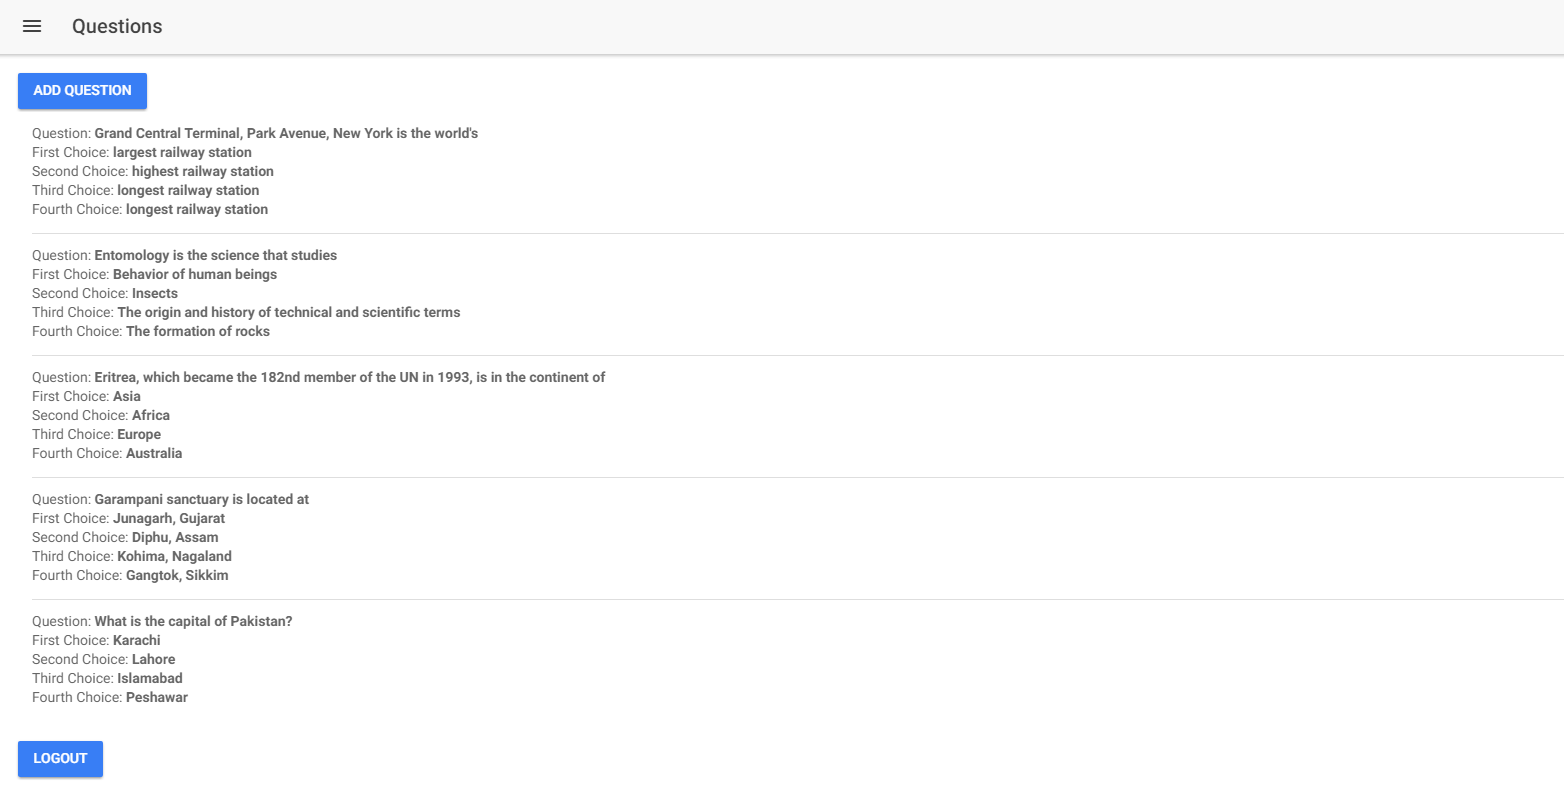
Now, open “questions.html” and copy the following content:
questions.html
<ion-header>
 <ion-navbar>
   <button ion-button menuToggle>
     <ion-icon name="menu"></ion-icon>
   </button>
   <ion-title>Questions</ion-title>
 </ion-navbar>
</ion-header>
<ion-content padding>
    <div *ngIf='!authStatus'>
    <h3>You need to login to see the Questions</h3>
   <form (ngSubmit)="login()">
       <ion-list>
           <ion-item>
               <ion-label stacked>Email</ion-label>
               <ion-input [(ngModel)]="userEmail"
                          type="email" name="userEmail"></ion-input>
           </ion-item>

           <ion-item>
               <ion-label stacked>Password</ion-label>
               <ion-input [(ngModel)]="userPassword"
                          type="password" name="userPassword"></ion-input>
           </ion-item>
           <hr/>
           <button type="submit" ion-button>Login!</button>
       </ion-list>
   </form>
    </div>
    <div *ngIf='authStatus'>
    <p>Current User: {{userEmail}}</p>
    <button ion-button (click)="addQuestion()">Add Question</button>

    <ion-list>
        <ion-item *ngFor="let item of questionArray" (click)="showQuestion(item)">
         <p>Question: <strong>{{item.questionText}}</strong></p>
         <p>First Choice: <strong>{{item.firstChoice}}</strong></p>
         <p>Second Choice: <strong>{{item.secondChoice}}</strong></p>
         <p>Third Choice: <strong>{{item.thirdChoice}}</strong></p>
         <p>Fourth Choice: <strong>{{item.fourthChoice}}</strong></p>
        </ion-item>
    </ion-list>

    <button (click)='logout()' ion-button>Logout</button>
    </div>
</ion-content>
This should be self-explanatory.
Now, open “question-add.ts” and copy the following code:
question-add.ts
import { Component, Input  } from '@angular/core';
import { NavController, ViewController } from 'ionic-angular';

import firebase from 'firebase';
@Component({
 selector: 'page-questions-add',
 templateUrl: 'questions-add.html'
})
export class QuestionsAdd {

    question: any;
    first: any;
    second: any;
    third: any;
    fourth: any;

    choices: any;
    correct: any;

    answers: any[];

    constructor(public nav: NavController, public view: ViewController) {

    }
    ionViewDidLoad() {
        console.log('ionViewDidLoad QuestionsAdd');
    }

    storeItem(){

        if ((this.question || this.first || this.second || this.third || this.fourth || this.choices) == null) {
            console.log("Please enter all the values");
            return;
        }
        let newItem = {
         question: this.question,
         answers: this.answers
        };
        this.view.dismiss(newItem);

        var self = this;

        var userId = firebase.auth().currentUser.uid;

        console.log(userId);

        var user = firebase.auth().currentUser;
        // Get a key for a new Post.
        var newPostKey = firebase.database().ref().child('questions').push().key;

        if (this.choices == "first") {
            this.correct = this.first;
        }

        else if (this.choices == "second") {
            this.correct = this.second;
        }

        else if (this.choices == "third") {
            this.correct = this.third;
        }

        else if (this.choices == "fourth") {
            this.correct = this.fourth;
        }

        var postData = {
            questionText: this.question,
            firstChoice: this.first,
            secondChoice: this.second,
            thirdChoice: this.third,
            fourthChoice: this.fourth,
            correct: this.correct
        };

        // Write the new post's data simultaneously in the posts list and the user's post list.
        var updates = {};
        updates['/questions/' + newPostKey] = postData;

        firebase.database().ref().update(updates);
    }
    close(){
        this.view.dismiss();
    }
}
Here, we are adding the new questions to our array, which is then submitted to JSON database on Firebase. You can see that I am generating unique key for new posts.
Now, open “questions-add.html” and copy the following content:
questions-add.html
<ion-header>
 <ion-toolbar color="secondary">
     <ion-title>
         Add Question
     </ion-title>
       <ion-buttons end>
           <button ion-button icon-only (click)="close()"><ion-icon name="close"></ion-icon></button>
       </ion-buttons>
   </ion-toolbar>
</ion-header>

<ion-content>
    <ion-list>
     <ion-item>
       <ion-label floating>Question</ion-label>
       <ion-input type="text" [(ngModel)]=question></ion-input>
     </ion-item>
     <ion-item>
       <ion-label floating>Answers</ion-label>
        <ion-input type="text" placeholder="First Choice" [(ngModel)]=first>First Choice: </ion-input>
        <ion-input type="text" placeholder="Second Choice" [(ngModel)]=second>Second Choice: </ion-input>
        <ion-input type="text" placeholder="Third Choice" [(ngModel)]=third>Third Choice: </ion-input>
        <ion-input type="text" placeholder="Fourth Choice" [(ngModel)]=fourth>Fourth Choice: </ion-input>
     </ion-item>
    </ion-list>

    <ion-list radio-group [(ngModel)]="choices">
    <ion-item>
   <ion-label>First Choice</ion-label>
   <ion-radio value="first" checked></ion-radio>
    </ion-item>
    <ion-item>
   <ion-label>Second Choice</ion-label>
   <ion-radio value="second"></ion-radio>
    </ion-item>
    <ion-item>
   <ion-label>Third Choice</ion-label>
   <ion-radio value="third"></ion-radio>
    </ion-item>
    <ion-item>
   <ion-label>Fourth Choice</ion-label>
   <ion-radio value="fourth"></ion-radio>
    </ion-item>
    </ion-list>

    <button full ion-button color="secondary" (click)="storeItem()">Save</button>

    <div padding>
     <b>Selected Choice for Answer: </b> {{choices}}
   </div>
</ion-content>
This code should be self-explanatory.
Now, open “questions-info.ts” and copy the following code:
questions-info.ts
import { Component } from '@angular/core';
import { NavParams } from 'ionic-angular';
import firebase from 'firebase';

import { NavController } from 'ionic-angular';
@Component({
 selector: 'page-questions-info',
 templateUrl: 'questions-info.html'
})
export class QuestionsInfo {
 question;
 firstChoice;
 secondChoice;
 thirdChoice;
 fourthChoice;
 correct;
 id;

 constructor(public navCtrl: NavController, public navParams: NavParams) {

 }
 ionViewDidLoad() {
    console.log('ionViewDidLoad QuestionsInfo');
    this.question = this.navParams.get('item').questionText;
   this.firstChoice = this.navParams.get('item').firstChoice;
    this.secondChoice = this.navParams.get('item').secondChoice;
    this.thirdChoice = this.navParams.get('item').thirdChoice;
    this.fourthChoice = this.navParams.get('item').fourthChoice;
    this.correct = this.navParams.get('item').correct;
    this.id = this.navParams.get('item').id;
 }

 delete() {
    var userId = firebase.auth().currentUser.uid;

    firebase.database().ref('questions/' + this.id).set({
        questionText: null,
        firstChoice: null
    });

    this.navParams.get('parentPage').showData()

    this.navCtrl.pop();
 }
}
Here, we have defined several properties/variables for printing the information of questions in our HTML side. We have also defined the method for deleting the questions.
Now, open “questions-info.html” and copy the following content:
questions-info.html
<ion-header>
 <ion-navbar color="secondary">
   <ion-title>
     {{email}}
   </ion-title>
 </ion-navbar>
</ion-header>
<ion-content>
 <ion-card>
   <ion-card-content>
     <p>Question: <strong>{{question}}</strong></p>
   </ion-card-content>
 </ion-card>

 <ion-card>
   <ion-card-content>
     <p>First Choice: <strong>{{firstChoice}}</strong></p>
     <p>Second Choice: <strong>{{secondChoice}}</strong></p>
     <p>Third Choice: <strong>{{thirdChoice}}</strong></p>
     <p>Fourth Choice: <strong>{{fourthChoice}}</strong></p>
     <p>Correct Answer: <strong>{{correct}}</strong></p>
   </ion-card-content>
 </ion-card>

 <button ion-button (click)="delete()">Delete it</button>
</ion-content>
This code should be self-explanatory like always, so let’s skip the explanation.
Now, let’s edit our quiz page!
Open “quiz.ts” and copy the following content:
quiz.ts
import { Component, ViewChild } from '@angular/core';
import { NavController, NavParams } from 'ionic-angular';
import { DataService } from '../../providers/data/data.service';

import { ChangeDetectorRef } from '@angular/core';
import { BehaviorSubject } from 'rxjs/Rx';
import { UserService } from '../../providers/user/user.service';

import firebase from 'firebase';
@Component({
 selector: 'page-quiz',
 templateUrl: 'quiz.html'
})
export class QuizPage {

    @ViewChild('slides') slides: any;
    answeredFinally: boolean = false;

    // Our total score counter
    score: number = 0;

    questions: any;
    loggedIn: boolean;

    public authStatus: boolean;

    private isAuth: BehaviorSubject<boolean>;

    public items = [];

    public questionArray: any;

    constructor(public navCtrl: NavController, public navParams: NavParams, public data: DataService, private user:UserService, private cd:ChangeDetectorRef) {
        this.isAuth = new BehaviorSubject(false);

        this.isAuth.subscribe(val => this.authStatus = val);

        this.data.getQuestionData().then((questions) => {
            if(questions){
                this.items = JSON.parse(questions);
            }
        });

        this.showData();
    }

    ionViewDidLoad() {
        console.log('ionViewDidLoad QuizPage');

        this.user.auth.onAuthStateChanged(user => {
            this.isAuth.next(!!user);
            this.cd.detectChanges();
        });
    }
    showData() {
        var self = this;

        var ref = firebase.database().ref('/questions/');
        ref.once('value').then(function(snapshot) {
            // We need to create this array first to store our local data
            let rawList = [];
            snapshot.forEach( snap => {
                //if (snap.val().email == self.userEmail) {
                    rawList.push({
                     id: snap.key,
                     questionText: snap.val().questionText,
                     firstChoice: snap.val().firstChoice,
                     secondChoice: snap.val().secondChoice,
                     thirdChoice: snap.val().thirdChoice,
                     fourthChoice: snap.val().fourthChoice,
                     correct: snap.val().correct
                    });
                //}

                // This is for debugging
                console.log("Rawlist questionText: " + snap.val().questionText);
                console.log("Rawlist firstChoice: " + snap.val().firstChoice);
                console.log("Rawlist secondChoice: " + snap.val().secondChoice);
                console.log("Rawlist thirdChoice: " + snap.val().thirdChoice);
                console.log("Rawlist fourthChoice: " + snap.val().fourthChoice);
                console.log("Rawlist correct: " + snap.val().correct);
         });

            self.questionArray = rawList;

            let order = self.questionArray;
             rawList = self.getRandomQuestions(order);
             self.questionArray = rawList;
        });
    }

    changeSlide(){
        this.slides.slideNext();
    }
    selectFirst: boolean;
    selectSecond: boolean;
    selectThird: boolean;
    selectFourth: boolean;

    checkAllFalse() {
        this.selectFirst = false;
        this.selectSecond = false;
        this.selectThird = false;
        this.selectFourth = false;
    }

    selectAnswer(question, selection, choice){

        if (selection == "first") {
            this.checkAllFalse();
            this.selectFirst = true;
        }

        else if (selection == "second") {
            this.checkAllFalse();
            this.selectSecond = true;
        }

        else if (selection == "third") {
            this.checkAllFalse();
            this.selectThird = true;
        }

        else if (selection == "fourth") {
            this.checkAllFalse();
            this.selectFourth = true;
        }

        this.answeredFinally = true;
        if(question.correct == choice){
            this.score++;
        }
        setTimeout(() => {
            this.answeredFinally = false;
            this.changeSlide();
            this.checkAllFalse();
        }, 1000);
    }

    getRandomQuestions(answers: any[]): any[] {
        for (let i = answers.length - 1; i > 0; i--) {
           let j = Math.floor(Math.random() * (i + 1));
           let temp = answers[i];
           answers[i] = answers[j];
           answers[j] = temp;
        }

        return answers;
    }
    restartQuiz(){
        this.score = 0;
        this.slides.slideTo(1, 1000);

        // In order to randomize our questions
        this.showData();
    }
}
Here, I have first defined the useful properties/variables, which include “slides” of @ViewChild, answeredFinally to check whether the user has answered the question, score for storing the count, questions array for storing our questions from JSON database on Firebase, etc.
Then I have defined several methods. showData() contains the code for storing the questions in our array, wherein we are also “randomizing” the questions. changeSlide() is used for changing the slides. checkAllFalse() is for setting all our boolean values to false. selectAnswer() is for actually executing our quiz logic. The rest should be self-explanatory.
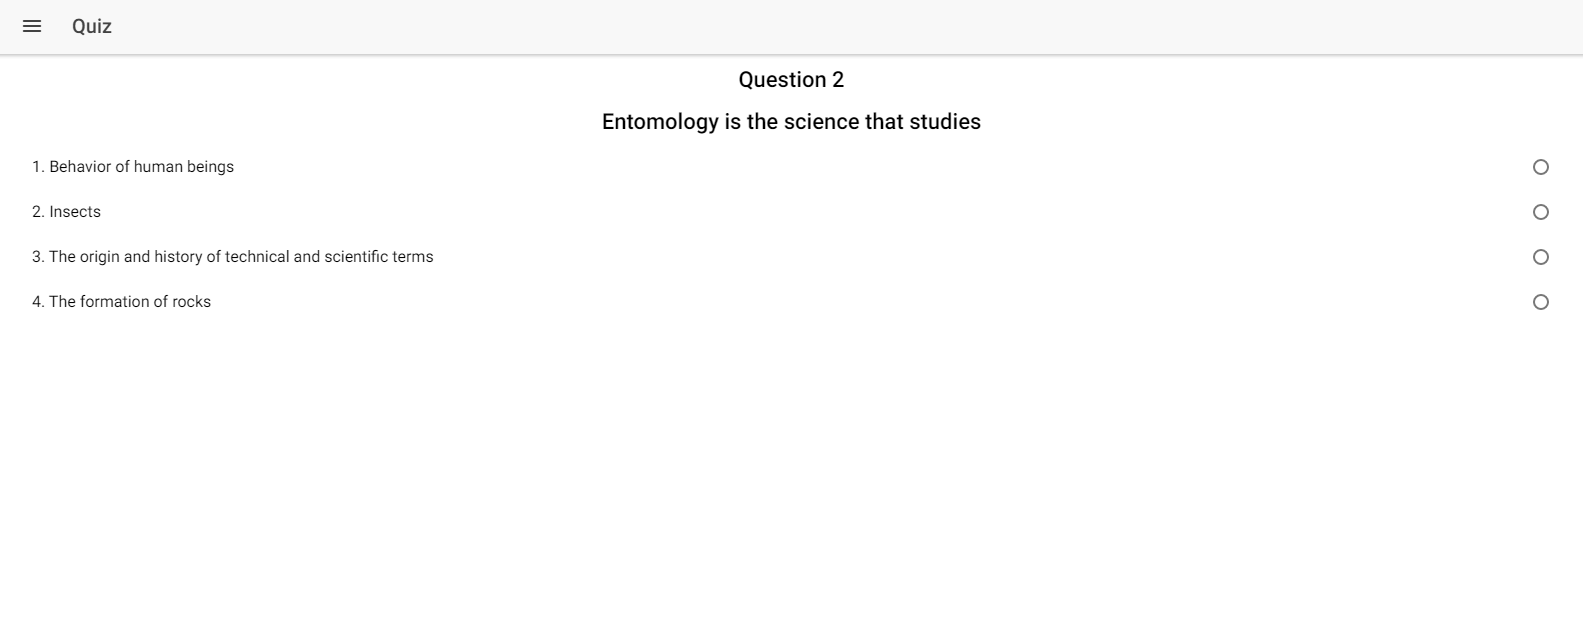
Now, open the “quiz.html” and copy the following code:
quiz.html
<ion-header>
 <ion-navbar>
   <button ion-button menuToggle>
     <ion-icon name="menu"></ion-icon>
   </button>
   <ion-title>Quiz</ion-title>
 </ion-navbar>
</ion-header>
<ion-content padding>

<div *ngIf='!authStatus'>
<h3>You need to sign-in (from Sign-in page) to see the questions</h3>
    </div>
    <div *ngIf='authStatus'>
<ion-slides #slides>
        <ion-slide>
            <button ion-button color="primary" (click)="changeSlide()">Start Quiz!</button>
        </ion-slide>

        <ion-slide *ngFor="let question of questionArray; let i = index;">
            <h3>Question {{i+1}}</h3>
            <h3>{{question.questionText}}</h3>
            <ion-list no-lines radio-group>
                <ion-item>
                    <ion-label>1. {{question.firstChoice}}</ion-label>
                    <ion-radio (click)="selectAnswer(question, 'first', question.firstChoice)" [checked]="selectFirst" [disabled]="answeredFinally"></ion-radio>
                </ion-item>
                <ion-item>
                    <ion-label>2. {{question.secondChoice}}</ion-label>
                    <ion-radio (click)="selectAnswer(question, 'second', question.secondChoice)" [checked]="selectSecond" [disabled]="answeredFinally"></ion-radio>
                </ion-item>
                <ion-item>
                    <ion-label>3. {{question.thirdChoice}}</ion-label>
                    <ion-radio (click)="selectAnswer(question, 'third', question.thirdChoice)" [checked]="selectThird" [disabled]="answeredFinally"></ion-radio>
                </ion-item>
                <ion-item>
                    <ion-label>4. {{question.fourthChoice}}</ion-label>
                    <ion-radio (click)="selectAnswer(question, 'fourth', question.fourthChoice)" [checked]="selectFourth" [disabled]="answeredFinally"></ion-radio>
                </ion-item>

            </ion-list>
        </ion-slide>

        <ion-slide>
            <h2>Your Final Score: {{score}}</h2>
            <button (click)="restartQuiz()" ion-button full color="primary">Start Quiz Again</button>
        </ion-slide>
</ion-slides>
</div>
</ion-content>
This is the most interesting part. We are using <ion-slides> for creating the slides component. Therein, we have defined several <ion-slide> which are allowed to be set only within <ion-slides>. You can add as many slides you want. Then we have added the questions with their answers to our slides. The rest should be easy to understand.
If you look at our code, I am using slideNext() to change the slide and slideTo() to move back to our first slide. Both these methods are very useful. If we had used the pages for creating new question/answers, then it would end up creating several items on the stack which will be hard to push and pop. You can read more about here (https://ionicframework.com/docs/v2/api/components/slides/Slides/).
Make sure all our pages are added in “app.component.ts” and “app.module.ts”.
You can do “ionic serve” to see the cool results.
You can see that I have added some questions by default. There are several websites which provide general knowledge questions and answers, I used this site (http://www.indiabix.com/general-knowledge/questions-and-answers/).
If you have trouble following the code, then you can see the uploaded repository here (https://github.com/danyalzia/ionic2-quiz-play).
Conclusion
So, now you have finally understood how quiz applications are meant to be developed in the Ionic 2 platform. You can use this approach to create as many different quiz applications as you want, or perhaps you can add new features, like integrating quizzes and polls from Facebook? The possibilities are endless!
If you have any question, then please ask in the comment section below!
Recent Stories


Top DiscoverSDK Experts


Featured Products


Compare Products
Select up to three two products to compare by clicking on the compare icon () of each product.
{{compareToolModel.Error}}
{{CommentsModel.TotalCount}} Comments
Your Comment