Sponsors


Ionic 2 Forms, Validation and Integration with Firebase
So far we have understood the basics of user interaction in Ionic 2 through side menu, tabs and pages. But, there will be times when your application requires the user to input something and have the application return something, let’s say a username and password. We also need to make sure that the values entered reflect on the HTML side and new updates happen on both the view and model side of the application.
Thankfully, Ionic 2 provides awesome built-in forms due to the support of AngularJS 2, which means you can use the similar data-driven or template-driven forms through ngModel data binding. You are also provided a FormBuilder that not only makes form creation easier, but also takes care of the validation of input values without you needing to do anything manually. In a nutshell, you can use your previous knowledge of AngularJS 2 here as well.
But what about the Backend side of Ionic 2? Well, thankfully, following the trend of AngularJS 2 and other modern web development frameworks, Ionic 2 supports integration with Firebase, so you get the online free database along with plenty of cool server side features, such as user authentication, hosting of the website, file storage, etc. And the best part is that integrating with Firebase is as easy as copying and pasting a few lines of code!
With the modern functionalities, you can enable multiple users in your application so that the every user has an account on the site, and so only users with an account on the website are allowed access to certain areas of the website. All this can be done easily, thanks to Ionic 2 support of sophisticated Forms and Firebase support.
In this article, I am going to show you how you can build multiple user applications through the use of AngularJS 2 Forms functionalities and after I will demonstrate user authentication through Firebase. I have broken the article down into two parts, with this being the first. Let’s get started!
Building a multiple user application on Ionic 2 – Part 1 -Understanding Forms, Validation and Integrating with Firebase
As I mentioned earlier, Ionic 2 uses the same approach as that of AngularJS 2 when it comes to forms. I will show you different approaches to forms, so you can get the gist of every method.
We can create forms using three distinct methods: 1) Simple ngModel binding method 2) a Data-driven approach using FormBuilder and 3) a Template based approach.
AngularJS 2 provides both one way and two way data-binding through ngModel. You can create forms in the simple ngModel manner similar to the AngularJS 1 style, so the HTML side will contain something like the following:
<form (ngSubmit)="login()">
     <ion-item>
       <ion-label>Name</ion-label>
       <ion-input type="text" [(ngModel)]="user.name" name="name"></ion-input>
     </ion-item>
     <ion-item>
       <ion-label>Age</ion-label>
       <ion-textarea [(ngModel)]=" user.age" name="age"></ion-textarea>
     </ion-item>
     <button ion-button type="submit" block>Add User</button>
   </form>
Here, we first use ngSubmit for adding the submit method (which we will implement in the component). And then we take input in the “user” array, which we create two elements: title and description. Once the input is taken, we are going to print the values to the console.
export class FormsPage {
 user = {}
 login() {
   console.log(this.user)
 }
}
It’s really that simple! This is how forms were created in Ionic 1. This simply passes and binds the object on the component class. This approach is programmatically less efficient, because you don’t have any control over the values, so if something goes wrong in the code, then it’s difficult to debug and so you are screwed! (for the most part anyway)
By the way, if you use a Form tag here, then you need to provide something in the “name” property, otherwise it will give errors. If you want the form to be standalone, then you need to set standalone to true in ngModelOptions, something like the following:
<ion-input type="text" [(ngModel)]="user.name" [ngModelOptions]="{standalone: true}"></ion-input>In this approach forms are created in the HTML side, and we simply print the values in our view side. This makes it hard to test the forms, especially if you are pursuing the unit testing.
You can use the data-driven approach through FormBuilder, resulting in your HTML side looking something like this:
<form [formGroup]="user" (ngSubmit)="login()">
     <ion-item>
       <ion-label>Name</ion-label>
       <ion-input type="text" formControlName="name"></ion-input>
     </ion-item>
     <ion-item>
       <ion-label>Age</ion-label>
       <ion-textarea formControlName="age"></ion-textarea>
     </ion-item>
     <button ion-button type="submit" [disabled]="!user.valid">Submit</button>
   </form>
Note that (ngModel) causes one way binding, while [(ngModel)] causes two way data-binding. If you’ve already read my article on the Grid example, you’ll remember that I spoke about this earlier.
We can also create forms through templates, so that the forms would be referred by itself in our class. Something like the following:
<form #form="ngForm" (ngSubmit)=" login(form)" novalidate>
     <ion-item>
       <ion-label>User</ion-label>
       <ion-input type="text" required [(ngModel)]="user.name" ngControl="name"></ion-input>
     </ion-item>
     <ion-item>
       <ion-label>Age</ion-label>
       <ion-textarea [(ngModel)]="user.age" ngControl="age"></ion-textarea>
     </ion-item>
     <button ion-button type="submit" block>Add User</button>
   </form>
And in our component class:
user = {
   name: '',
   age: ''
 };
 login(form) {
   console.log(form.value)
 }
Here, the values are pulled directly from the “form” rather than our “user” array like in the previous case.
Creating a project
Even though I have shown you different approaches to forms, we will use the FormBuilder approach. We will use FormControl and FormGroup. FormControl has an input field and a validation state, whereas FormGroup is a collection (or array) of FormControl. FormBuilder makes this process easier for us, and you’ll see just how later on.
First you need to create a new project:
$ ionic start ionic-forms blank --v2We will be building for our previous project, so basically the navigation menu remains similar in style. If you remember the previous Firebase article I wrote for AngularJS 2, then you know that I used the HTTP method to read the data from the address, plus enabled the user authentication on the site.
We would be doing something similar, but in the style of Ionic 2, so the experience will be optimized for the mobile users.
By default, the “pages” folder will contain “home” directory. In the navigation element, <ion-navbar>, add the following code for the navigation button:
<button ion-button menuToggle>
     <ion-icon name="menu"></ion-icon>
</button>
We will be creating new pages:
$ionic g page signin

$ionic g page signup

$ionic g page showdata
Create two new files in “src/app” directory, “auth.service.ts” and “auth.guard.ts”, and copy the following contents:
auth.service.ts
import { Injectable } from "@angular/core";

export interface User {
   email: string;
   password: string;
   confirmPassword?: string;
}

// Our firebase variable from index.html,..... yes we are using JavaScript Firebase code
declare var firebase: any;

@Injectable()
export class AuthService {
 constructor() {

 }

 signupUser(user: User) {
   firebase.auth().createUserWithEmailAndPassword(user.email, user.password)
     .catch(function (error) {
       console.log(error);
     });
 }

 signinUser(user: User) {
   firebase.auth().signInWithEmailAndPassword(user.email, user.password)
     .catch(function (error) {
       console.log(error);
     });
 }

 logout() {
   firebase.auth().signOut();
   //this.router.navigate(['/signin']);
 }

 isAuthenticated() {
   var user = firebase.auth().currentUser;

   if (user) {
     return true;
   } else {
     return false;
   }
 }
}
auth.guard.ts
import { Injectable } from "@angular/core";
import { AuthService } from "./auth.service";

@Injectable()
export class AuthGuard {
 constructor(private authService: AuthService) {}

 canActivate() {
   return this.authService.isAuthenticated();
 }
}
You can see that both these files are using @Injectable() because they are services, so you need to add them to the “providers” array of “app.module.ts” along with the pages you are using. Now here is the complete content of “app.module.ts”:
app.module.ts
import { NgModule, ErrorHandler } from '@angular/core';
import { IonicApp, IonicModule, IonicErrorHandler } from 'ionic-angular';
import { MyApp } from './app.component';

import { HomePage } from '../pages/home/home';
import { SigninPage } from '../pages/signin/signin';
import { SignupPage } from '../pages/signup/signup';
import { ShowdataPage } from '../pages/showdata/showdata';

import { AuthService } from "./auth.service";

import {DataTableModule} from "angular2-datatable";

import {
 ReactiveFormsModule
} from '@angular/forms';

import { AuthGuard } from "./auth.guard";

@NgModule({
 declarations: [
   MyApp,
   HomePage,
SigninPage,
SignupPage,
ShowdataPage
 ],
 imports: [
   IonicModule.forRoot(MyApp, {
tabsPlacement: 'bottom',
 platforms: {
android: {
 tabsPlacement: 'top'
},
ios: {
 tabsPlacement: 'top'
},
windows:
{
 tabsPlacement: 'top'
}
 }
}),
DataTableModule,
ReactiveFormsModule
 ],
 bootstrap: [IonicApp],
 entryComponents: [
   MyApp,
   HomePage,
SigninPage,
SignupPage,
ShowdataPage
 ],
 providers: [AuthService, AuthGuard, {provide: ErrorHandler, useClass: IonicErrorHandler}]
})
export class AppModule {}
The following is the complete content of “app.component.ts”:
app.component.ts
import { Component, ViewChild } from '@angular/core';
import { Nav, Platform } from 'ionic-angular';
import { StatusBar, Splashscreen } from 'ionic-native';

import { HomePage } from '../pages/home/home';
import { SigninPage } from '../pages/signin/signin';
import { SignupPage } from '../pages/signup/signup';
import { ShowdataPage } from '../pages/showdata/showdata';

import { AuthService } from "./auth.service";

@Component({
 templateUrl: 'app.html'
})
export class MyApp {
 @ViewChild(Nav) nav: Nav;

 rootPage: any = HomePage;

 pages: Array<{title: string, component: any}>;

 constructor(public platform: Platform, private authService: AuthService) {
   this.initializeApp();
   // used for an example of ngFor and navigation
   this.pages = [
     { title: 'Home', component: HomePage },
 { title: 'Sign-in', component: SigninPage },
 { title: 'Sign-up', component: SignupPage },
 { title: 'Show Data', component: ShowdataPage }
   ];
 }

 initializeApp() {
   this.platform.ready().then(() => {
     // Okay, so the platform is ready and our plugins are available.
     // Here you can do any higher level native things you might need.
     StatusBar.styleDefault();
     Splashscreen.hide();
   });
 }

 openPage(page) {
   // Reset the content nav to have just this page
   // we wouldn't want the back button to show in this scenario
   this.nav.setRoot(page.component);
 }

 isAuth() {
   return this.authService.isAuthenticated();
 }

 onLogout() {
   this.authService.logout();
 }
}
Now, copy the following content to “app.html”:
app.html
<ion-menu type="push" [content]="content">
<ion-header>
<ion-toolbar>
<ion-title>Menu</ion-title>
</ion-toolbar>
</ion-header>
<ion-content>
<ion-list>
<button menuClose ion-item *ngFor="let p of pages" (click)="openPage(p)">
{{p.title}}
</button>
</ion-list>
</ion-content>
</ion-menu>
<!-- Disable swipe-to-go-back because it's poor UX to combine STGB with side menus -->
<ion-nav [root]="rootPage" #content swipeBackEnabled="false">
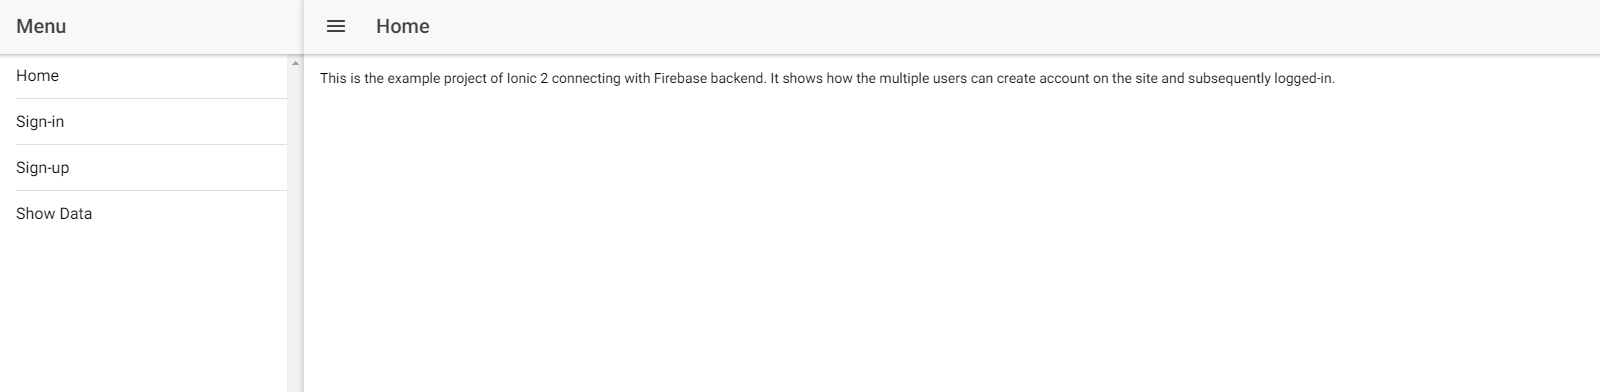
</ion-nav>Let’s make our “home” page a bit cooler, copy the following code to “home.html”:
home.html
<ion-header>
 <ion-navbar>
   <button ion-button menuToggle>
     <ion-icon name="menu"></ion-icon>
   </button>
   <ion-title>Home</ion-title>
 </ion-navbar>
</ion-header>

<ion-content padding>
This is the example project of Ionic 2 connecting with Firebase’s backend. It shows how multiple users can create account on the site and subsequently log-in.
</ion-content>
Now, we will be writing the Forms code for the sign-in and sign-up. Copy the following content to “signin.ts”:
signin.ts
import { Component } from '@angular/core';
import { NavController, NavParams } from 'ionic-angular';

import { FormBuilder, FormGroup, Validators } from "@angular/forms";
import { AuthService } from "../../app/auth.service";

@Component({
 selector: 'page-signin',
 templateUrl: 'signin.html'
})
export class SigninPage {

 ionViewDidLoad() {
   console.log('ionViewDidLoad SigninPage');
 }

myForm: FormGroup;
   error = false;
   errorMessage = '';

   constructor(public navCtrl: NavController, public navParams: NavParams, private fb: FormBuilder, private authService: AuthService) {}

   onSignin() {
     this.authService.signinUser(this.myForm.value);
   }

   ngOnInit():any {
       this.myForm = this.fb.group({
           email: ['', Validators.required],
           password: ['', Validators.required],
       });
   }
}
Now, copy the following content to “signin.html”:
signin.html
<ion-header>

   <ion-navbar>
   <button ion-button menuToggle>
     <ion-icon name="menu"></ion-icon>
   </button>
   <ion-title>Sign-in</ion-title>
 </ion-navbar>

</ion-header>

<ion-content padding>

<h3>You need to sign-in to see the Employee Data</h3>
<form [formGroup]="myForm" (ngSubmit)="onSignin()">
     <ion-item>
       <ion-label>E-Mail</ion-label>
       <ion-input type="text" formControlName="email"></ion-input>
     </ion-item>
     <ion-item>
       <ion-label>Password</ion-label>
       <ion-input formControlName="password" type="password"></ion-input>
     </ion-item>
     <button ion-button type="submit" [disabled]="!myForm.valid">Sign in</button>
</form>
</ion-content>
Here, we are using the FormGroup to create our array of the input. There is not much to validate here, except the given values shouldn’t be null or empty.
Now, copy the following content to “signup.ts”:
signup.ts
import { Component, OnInit } from '@angular/core';
import { NavController, NavParams } from 'ionic-angular';

import { FormBuilder, FormGroup, Validators, FormControl } from "@angular/forms";

import { AuthService } from "../../app/auth.service";
@Component({
 selector: 'page-signup',
 templateUrl: 'signup.html'
})
export class SignupPage implements OnInit {

 constructor(public navCtrl: NavController, public navParams: NavParams, private fb: FormBuilder, private authService: AuthService) {}

 ionViewDidLoad() {
   console.log('ionViewDidLoad SignupPage');
 }

 myForm: FormGroup;
   error = false;
   errorMessage = '';

   onSignup() {
     this.authService.signupUser(this.myForm.value);
   }

   ngOnInit(): any {
       this.myForm = this.fb.group({
           email: ['', Validators.compose([
               Validators.required,
               this.isEmail
           ])],
           password: ['', Validators.required],
           confirmPassword: ['', Validators.compose([
               Validators.required,
               this.isEqualPassword.bind(this)
           ])],
       });
   }

   isEmail(control: FormControl): {[s: string]: boolean} {
       if (!control.value.match(/^\w+@[a-zA-Z_]+?\.[a-zA-Z]{2,3}$/)) {
           return {noEmail: true};
       }
   }

   isEqualPassword(control: FormControl): {[s: string]: boolean} {
       if (!this.myForm) {
           return {passwordsNotMatch: true};

       }
       if (control.value !== this.myForm.controls['password'].value) {
           return {passwordsNotMatch: true};
       }
   }
}
Now, copy the following content to “signup.html”:
signup.html
<ion-header>
 <ion-navbar>
   <button ion-button menuToggle>
     <ion-icon name="menu"></ion-icon>
   </button>
   <ion-title>Sign-up</ion-title>
 </ion-navbar>
</ion-header>

<ion-content padding>

<h3>Sign-up to see the Employee page</h3>
<form [formGroup]="myForm" (ngSubmit)="onSignup()">
     <ion-item>
       <ion-label>E-Mail</ion-label>
       <ion-input formControlName="email" type="email" id="email" #email class="form-control"></ion-input>
<span *ngIf="!email.pristine && email.errors != null && email.errors['noEmail']">Invalid mail address</span>
     </ion-item>
     <ion-item>
       <ion-label>Password</ion-label>
       <ion-input formControlName="password" type="password" id="password" class="form-control"></ion-input>
     </ion-item>
 <ion-item>
       <ion-label for="confirm-password">Confirm Password</ion-label>
       <ion-input formControlName="confirmPassword" type="password" id="confirm-password" #confirmPassword class="form-control"></ion-input>
<span *ngIf="!confirmPassword.pristine && confirmPassword.errors != null && confirmPassword.errors['passwordsNotMatch']">Passwords do not match</span>
     </ion-item>
     <button ion-button type="submit" [disabled]="!myForm.valid">Sign up</button>
   </form>
</ion-content>
Here, we are doing several validations. First of all, we are checking the input of email with the regular expressions to see if the format is correct, then we are also checking that both passwords entered are equal or matching. In the HTML side, we are doing Boolean logic to give the errors on the screen, so for example IF the password is not good AND the two passwords are not matched, THEN give the error.
Now, for our last page “showdata”, open the “showdata.ts” and copy the following content:
showdata.ts
import { Component, OnInit } from '@angular/core';
import { NavController, NavParams } from 'ionic-angular';

import {Http} from "@angular/http";
import * as _ from 'lodash';

import * as Rx from 'rxjs/Rx';

@Component({
 selector: 'page-showdata',
 templateUrl: 'showdata.html'
})
export class ShowdataPage implements OnInit {

 ionViewDidLoad() {
   console.log('ionViewDidLoad ShowdataPage');
 }

   private data;

 constructor(public navCtrl: NavController, public navParams: NavParams,
   private http:Http
 ) {
   http.get("https://awesome-app-ionic.firebaseio.com/.json")
     .subscribe((data)=> {
       setTimeout(()=> {
         this.data = data.json();
       }, 1000);
     });
 }

 private sortByWordLength = (a:any) => {
   return a.name.length;
 }

 ngOnInit() {
 }
}
Now, copy the following content to “showdata.html”:
showdata.html
<ion-header>

   <ion-navbar>
   <button ion-button menuToggle>
     <ion-icon name="menu"></ion-icon>
   </button>
   <ion-title>Show Data</ion-title>
 </ion-navbar>

</ion-header>

<ion-content padding>

<div class="container" id="colorbody">
   <div class="page-header">
     <h1>
       <span>Employee List</span>
     </h1>
   </div>
   <div class="panel panel-default" style="width: 35%">
     <div class="panel-heading">User information</div>

     <table class="table table-striped" [mfData]="data" #mf="mfDataTable"[mfRowsOnPage]="10" style="width: 10%">
       <thead>
       <tr>
         <th style="width: 10%"></th>

         <th style="width: 20%">
             <mfDefaultSorter by="name">Employee Name</mfDefaultSorter>
         </th>
         <th style="width: 40%">
           <mfDefaultSorter by="email">Days Work</mfDefaultSorter>
         </th>
         <th style="width: 10%">
           <mfDefaultSorter by="age">Hourly Rate</mfDefaultSorter>
         </th>
       </tr>
       </thead>
       <tbody>
       <tr *ngFor="let item of mf.data">
         <td>
         </td>

         <td>{{item.employeeName}}</td>
         <td>{{item.daysWork}}</td>
         <td class="text-right">{{item.hourlyRate}}</td>

         <td>
         </td>
       </tr>
       </tbody>
       <tfoot>
       <tr>
         <td colspan="5">
           <mfBootstrapPaginator [rowsOnPageSet]="[5,10,15]"></mfBootstrapPaginator>
         </td>
       </tr>
       </tfoot>
     </table>
   </div>
</div>

</ion-content>
You need to install the angular2-datatable that we are using:
$ npm i -S angular2-datatable
You can see the pages if you do “ionic serve”.
We need to integrate the Firebase to our application. Thankfully, Firebase supports a seamless integration. Open the “index.html” in “src/” directory, and copy the following code just before the end of </body>:
<script src="https://www.gstatic.com/firebasejs/3.6.6/firebase.js"></script>
 <script>
// Initialize Firebase
   var config = {
     apiKey: "AIzaSyBcSXHF8LARZQJDoWSoLGuQO6DMAm6KDMo",
     authDomain: "awesome-app-ionic.firebaseapp.com",
     databaseURL: "https://awesome-app-ionic.firebaseio.com",
     storageBucket: "awesome-app-ionic.appspot.com",
     messagingSenderId: "931508989005"
   };
   firebase.initializeApp(config);
 </script>
This sets up the firebase. If you are not connected to the internet, then it will give “firebase not defined” errors, if you do “ionic serve” right now, because this implies that your internet connection is not working. You may notice “auth.service.ts” contains the variable “firebase”, but this only gets instantiated if the JavaScript library is loaded correctly, or in other words when the internet connection is working OK.

We are integrating authentication, which simply provides a mechanism on your website that restricts the users from accessing certain pages of your site if they do not fulfill certain criteria. Many websites allow the integration of their sites for the login purposes, for example, Google and Facebook, both provide the login integration for any website for getting the credentials. If they are matched, then users are allowed to visit a certain page.
Previously, people used Auth0 for the authentication, but with the advent of Firebase, it is becoming obsolete as Firebase provides the backend integration for every modern social media site and email accounts.
I used the project that is hosted on my account of Firebase, but you can create your own projects as well. Go to the Firebase console screen, and you will see your projects. Click on the top-left side of the project list, and you will get the option “Create new project”. Through it, you can create a new project. I called my project “awesome-app-ionic”, but you can call it “not-awesome-app” and it will work just fine.
Once the project creation is successful, go to the Authentication page, and enable the email account. In the Database section, go to the Rules, and change the read and write values to "true" that is set to "auth != null" by default. But, you wouldn’t need to do it, because by default it says that only the authorized users are allowed to read and write, so leave the original values.
We are reading JSON file from my address, so you need to change it to your address. Go to “showdata.ts” and change the address line:
http.get("https://my-not-awesome-app-ionic.firebaseio.com/.json")
Now you need to import the JSON file on your site as well. Go to the Database section of Firebase, and do “Import JSON”.
We need to protect our “Show Data” page from unauthorized access. We are using navigation menus, meaning we need to either disable the “Show Data” page or not show it all till the user logs-in or signs-up. Unfortunately, routers are not supported in Ionic 2, so the native implementation of “canActivate” can not work, so we need to approach the problem in a different manner.
If you notice the “Show Data” page, it is not rendering the rows and columns properly. This is due to the original library using Bootstrap, but for some unknown reason, adding the Bootstrap library to the project screws up the text color of the items in list of pages, so Bootstrap is not officially supported in Ionic 2.
In the next part, I will look into this authentication problem, and also use the Storage functionality of the Firebase along with the potentially better data table integration.
Conclusion
Thus so far I have shown you how you can build a multiple user application in Ionic 2 through forms. I have also highlighted how easy it is to integrate the Firebase in your websites. All these features tightly packed together in a single package makes this platform highly compelling to companies that are into start-up commercial projects.
If you have any questions, then please ask in the comment section below!
Recent Stories


Top DiscoverSDK Experts


Featured Products

Compare Products
Select up to three two products to compare by clicking on the compare icon () of each product.
{{compareToolModel.Error}}
{{CommentsModel.TotalCount}} Comments
Your Comment